Ultra-Portable Data Center
I’m travelling. A lot. And I work with data. With a lot of data. A lot of private data. My own data, but also data from clients. Highly confidential data.
Update 01/2024: I have migrated the UPDC to TrueNAS SCALE for the sake of simplicity and maintainability. Hence, the NixOS setup described in this post is no longer accurate for this device.
Having all this data available at any time, anywhere, no matter what is pretty crucial to me. Hence, I cannot rely on a cloud service for storing and accessing that data. Not only because “the cloud” is basically just someone else’s computer and I don’t feel comfortable storing gigabytes of confidential data on someone else’s computer. But also because I cannot guarantee to have fast and reliable internet connectivity at any time. Especially while travelling through central and south-west Europe, good connectivity is a rare commodity. And with Apple charging an arm and a leg for any MacBook Pro with over 1TB of non-redundant storage, having everything on my laptop is really not an option.
The Background
Before this whole idea came to life, I had dedicated hardware on which I ran Resilio Sync – formerly known as BitTorrent Sync – as a Docker container inside of a Debian VM, which in turn was running on a KVM host based on NixOS. The host system featured an AMD Ryzen 7 2700 with 32GB DDR4 RAM on an Asus ROG STRIX X470-I mainboard that had two 512GB Samsung 970 Pro NVMe M.2 SSDs attached to it (solely for running the host system in a RAID1) and in addition four 3.5" 4TB WD RED SATA drives in a RAID5 for the actual data. Both RAIDs were LUKS encrypted and required a USB key to boot/mount. Long story short: I had a pretty neat setup for storing data and accessing it from everywhere over the internet. I even had it packed-up nicely in a Phanteks Evolv Shift X and cooled by a NZXT Kraken X42 AIO.
However, while this setup was working perfectly fine for me, it wasn’t necessarily the most portable one. I could have crammed the Evolv case into a suitcase to carry it around, but I doubt the hardware (especially the glas panels) would have survived even a single flight. Clearly, I needed something that was a lot more compact and a few pounds lighter, if I wanted to be able to travel with it.
The Options
There are a variety of SFF options on the market, so I could have simply bought
a pre-built system, maybe something like a Synology two-bay system. However, I
didn’t feel like giving up the freedom of having a full-blown Linux at my
disposal and being able to run additional containers and VMs. I like to off-load
tasks from my MacBook to that system, especially when it’s something that runs
in the background for longer periods of time and drains battery power only to
produce some sort of output I’m ultimately interested in. Importing large
datasets into databases (e.g. OpenStreetMap’s planet.osm) or
compiling/rendering things (e.g. map tiles) are two examples of such tasks.
Obviously, the hardware used in many pre-built solutions wouldn’t be what I was looking for. My second option was to look for a SFF case and retrofit my existing hardware into it. And what should I say, there are plenty of neat looking SFF cases! However, after browsing through what was mainly Alibaba and the things people on /r/sffpc posted, the limitations of those basically killed this idea as well.
The Limitations
The first and foremost limitation wasn’t necessarily size, but rather the weight. I planned the portable version of my storage/computing system to be really… well.. portable. In fact it should be so portable that I could have it with me as cabin luggage on a flight. This means, it ought not surpass certain measures and it shouldn’t weight over 8 kilograms, which is the limit on some European airlines. In fact, it should even allow me to bring a couple of extra things with me as well, hence it should be a lot lighter than that actually and not occupy more than half of my duffel bag.
Four 3.5" WD RED NAS drives alone already account for 2.72kg of weight – not to mention that none of the SFF cases I’ve found were able to even fit all of them. Clearly I had to replace those with 2.5" drives, which is what I eventually did. I found that Seagate’s 2.5" Barracuda drives are available as 4TB drives. The only downsides of those are their double thickness (15mm) and their speed. However, none of these would be too big of an issue for me.
Note: Downsizing to only two disks was not an option for me, since I need a mixture of capacity and redundancy that’s simply not possible to achieve on a 2.5" form factor yet.
The Down-Sizing
Even with four 2.5" disks the number of options in terms of cases is quite small. Besides, all cases that I’ve found were made of some sort of metal and thereby added a lot of weight to the build. I needed something more light that ideally would allow me to re-use all my existing hardware (excluding the 3.5" drives). I even planned on continuing to use the bulky Kraken water-cooler, because it’s a really great AIO product in my opinion.
Long story short, I decided to take matters into my own hands. After a few nights of brainstorming and sketching I came up with a design that looked very promising.
The Frame
The first part of this design was the interior frame, that I needed for mounting the mainboard, the PSU, and the drives. It took some time to get the measures right, especially because I didn’t really know what to expect of the material I was planning to use: PETg.
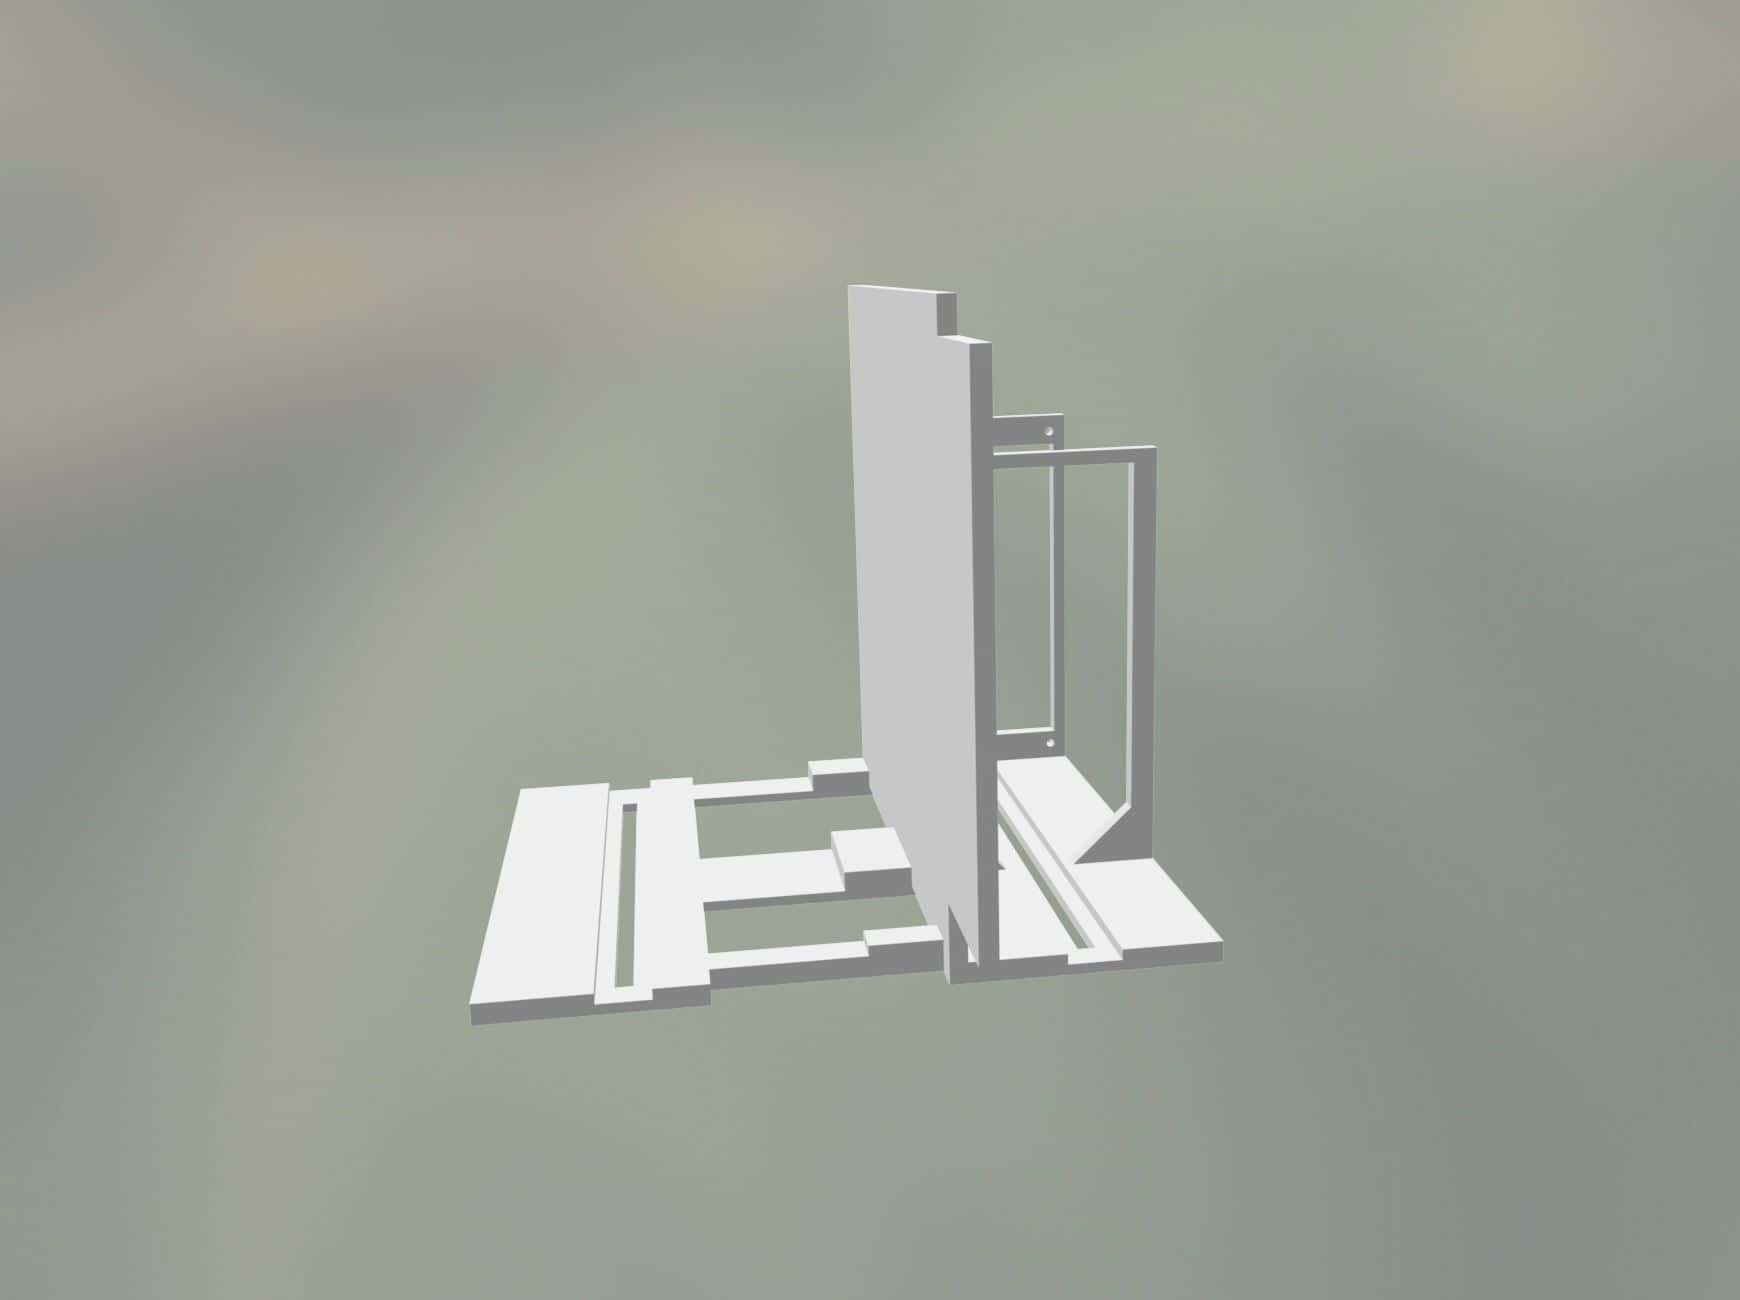
A couple of iterations later uploaded the design on 3D Hubs and had it printed right away. Luckily, the finished print arrived a couple of days later and it turned out to be on point in terms of weight and strength. On the very same day I started tearing apart my running system and moved the motherboard, the AIO and the PSU onto the PETg frame. I wanted to test whether and how the material reacted to the heat that the components build up over time. At that point I still had the four 3.5" drives attached to the Phanteks tower and cross-connected to the motherboard that was mounted onto the newly printed frame. Therefor the heat test wasn’t 100% accurate, but at least it would give me some basic impression on how the material would react. My test turned out to look promising, with the material sustaining the heat from the motherboard (including both NVMe SSDs) and the PSU without any issues. I left the setup running while I continued designing the exterior.
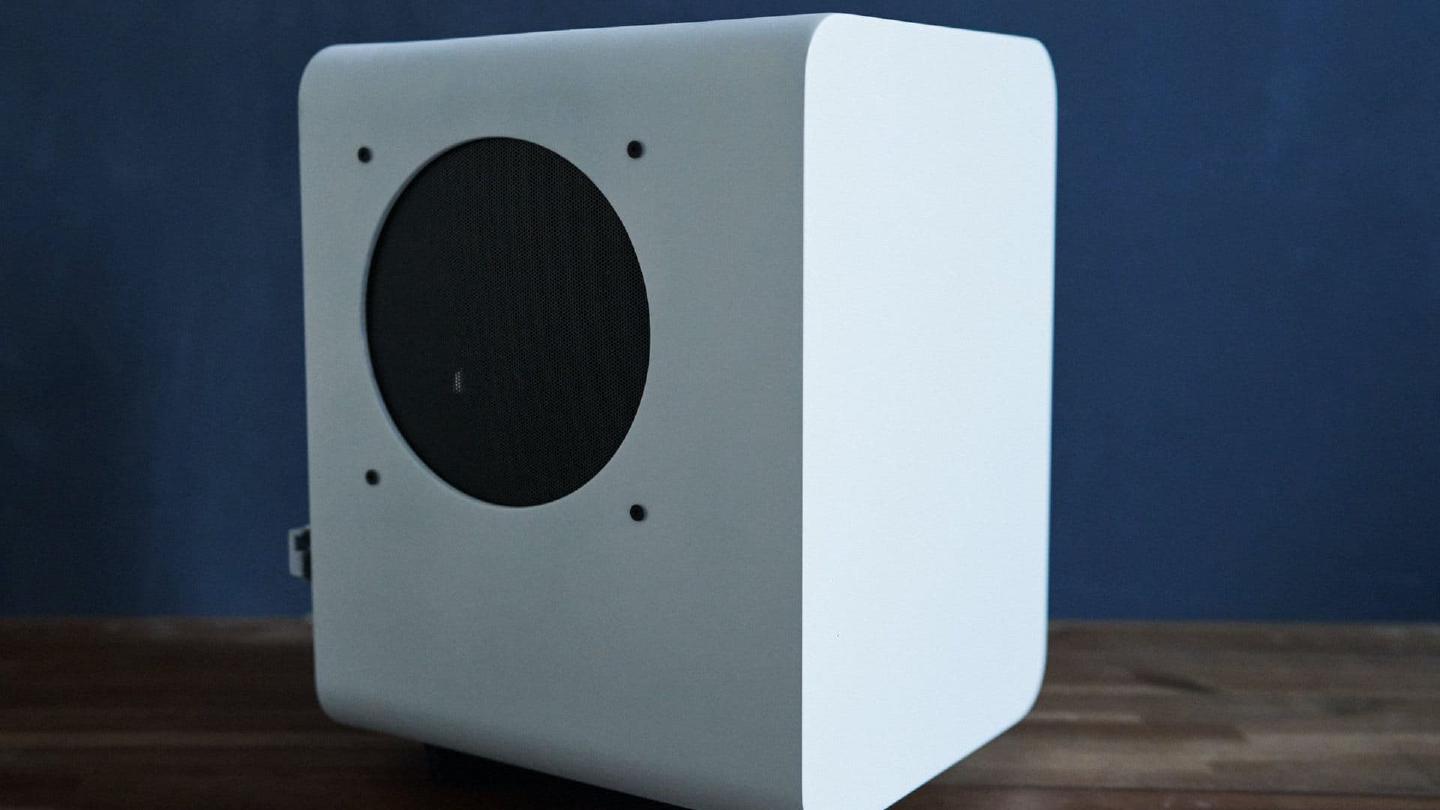
The Case
Designing that was a lot harder, since it required some air-gaps in order to allow for the material to “work” while being packed into a bag, without actually compromising on its stability. Ideally, the exterior should absorb light hits and allow for a slight flexibility in terms of mounting the inner frame, so that I would still be able to replace components with different ones. After hours of fumbling in SketchUp, I eventually reached a version that I was confident printing.
I uploaded it to 3D Hubs as well and received it a couple of days later. This time however I couldn’t use the part right away. I wanted the whole thing to look decent, so I took my time to sand it down and apply primer a couple of times, until I got a smooth surface for spray-painting. For priming I used good old grey Tamiya liquid and spray primer; for the paint job I solely used spray-paint (Tamiya AS-20). I tested TS-81 before, but after it dried for a couple of days it resembled those unpainted airplane modelling sets in color – which I didn’t like too much.
The whole priming and painting process probably took the majority of time, not only because the material had a couple of very rough spots, but also because it took a while for every layer of primer to fully dry. And since all those steps had to be redone for the back-plate (which is an individual part on it’s own), it really stretched this project’s timeline from a few days to little over a month. In the end I think the result was worth the work though.
The Result
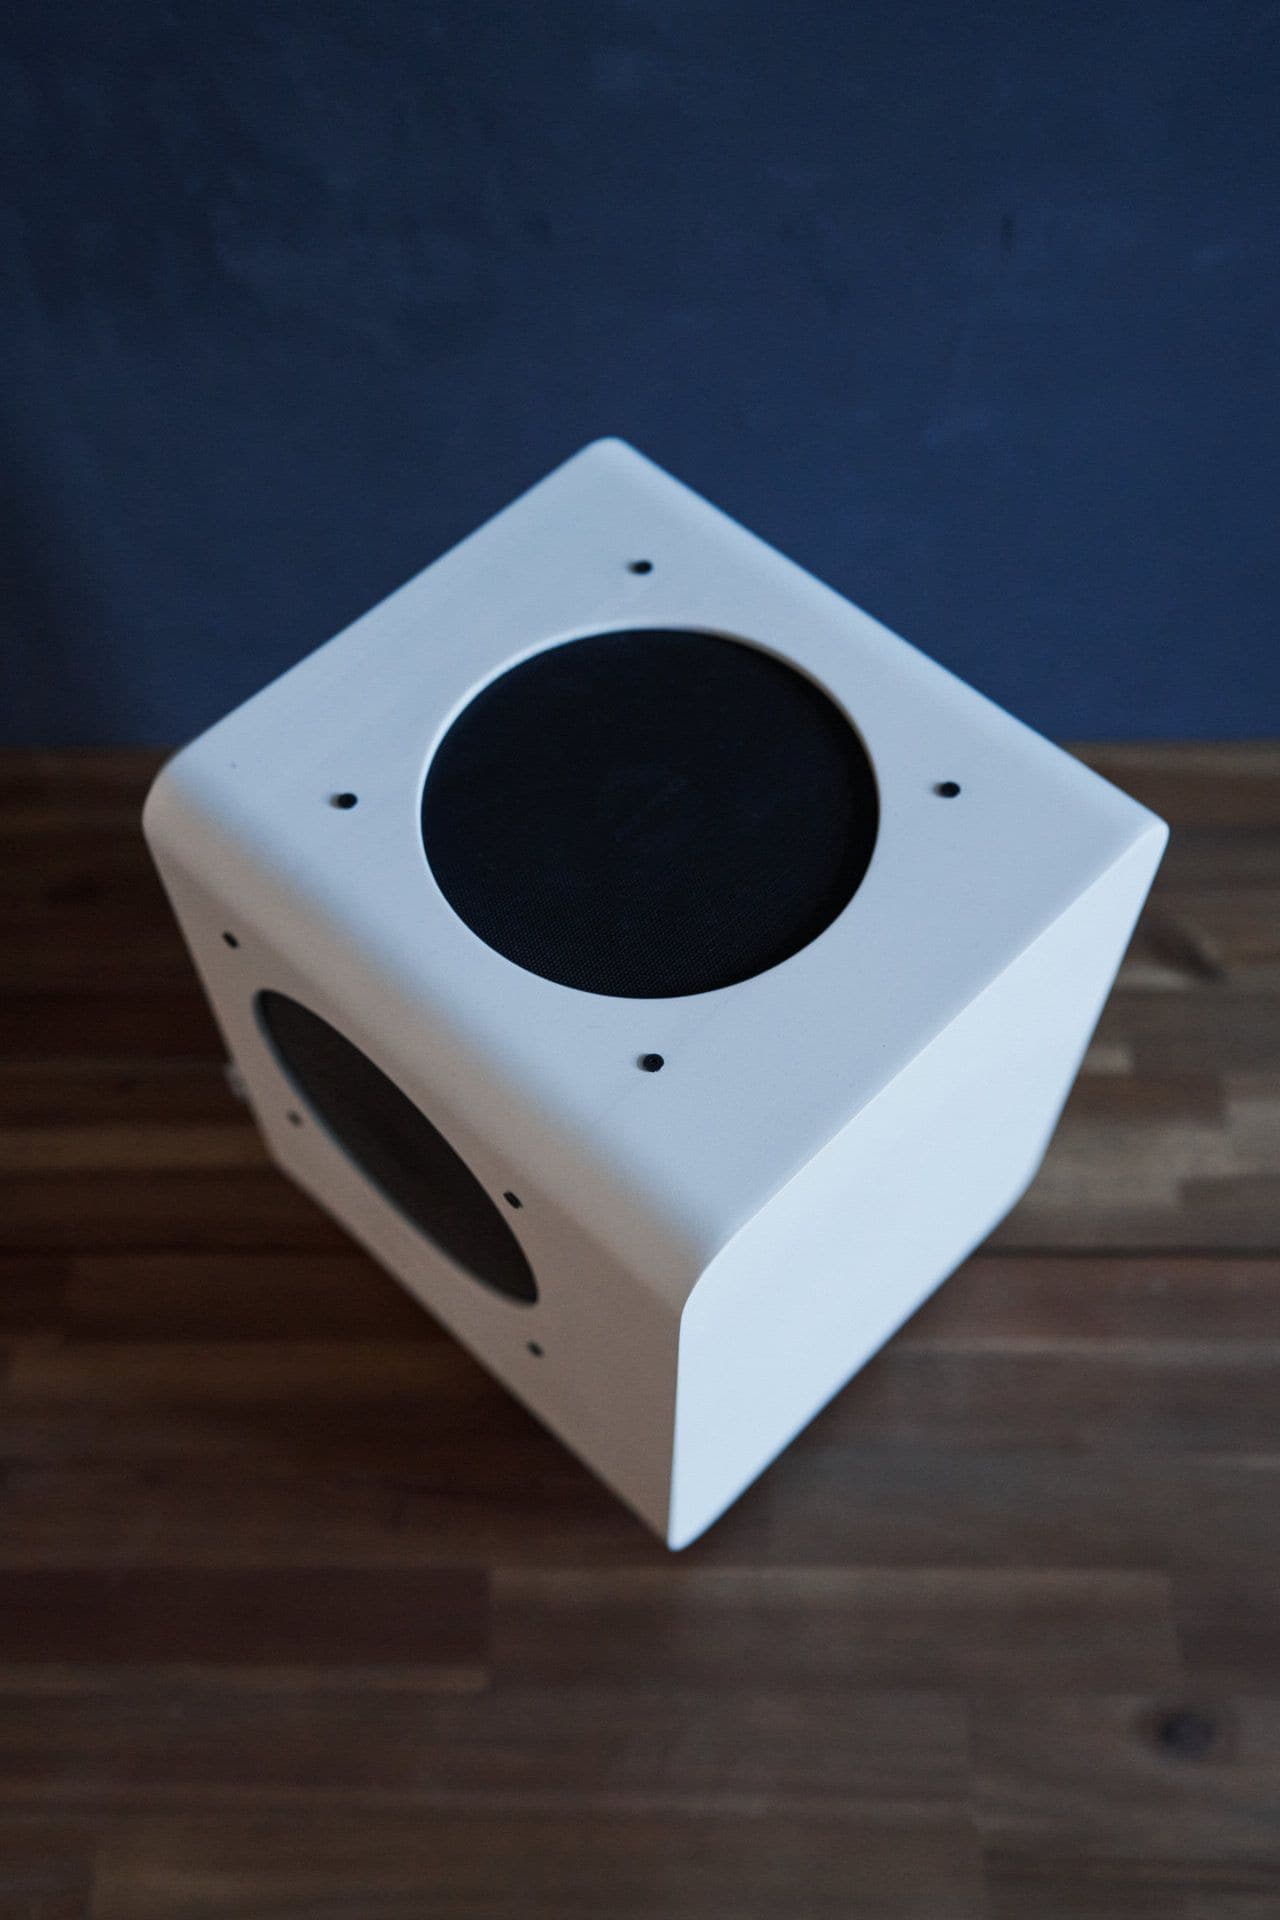

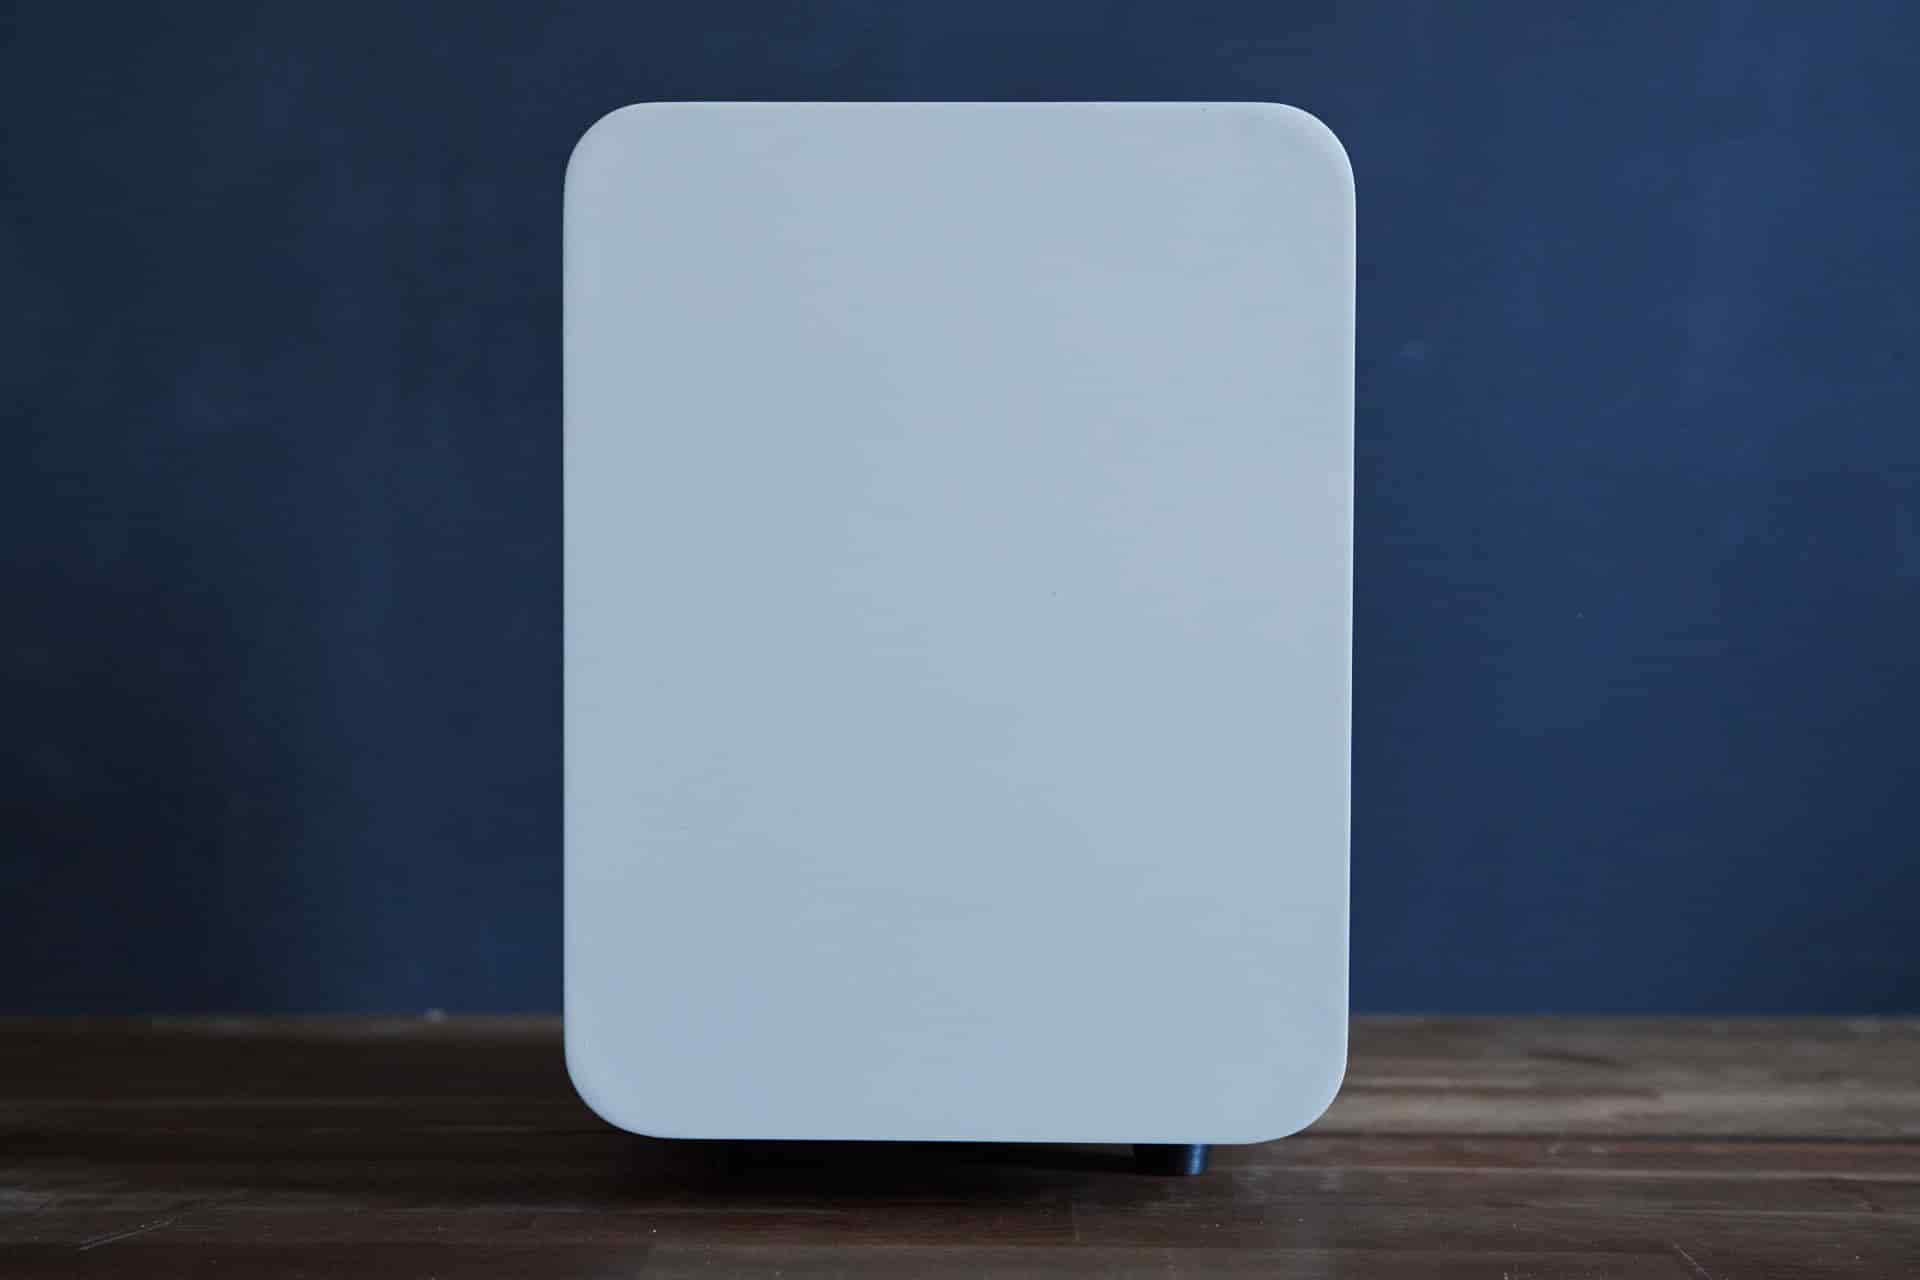


The Specs
Unlike initially planned, the specs turned out like this:
| Component | Product |
|---|---|
| Mainboard | Asus ROG STRIX X470-I |
| CPU | AMD Ryzen 7 2700 |
| RAM | Vengeance LPX 32GB DDR4 |
| HDDs | 2 x 512GB Samsung 970 Pro NVMe M.2 SSDs, 4 x 2.5" Seagate Barracuda 4TB |
| Cooling | NZXT Kraken X42 |
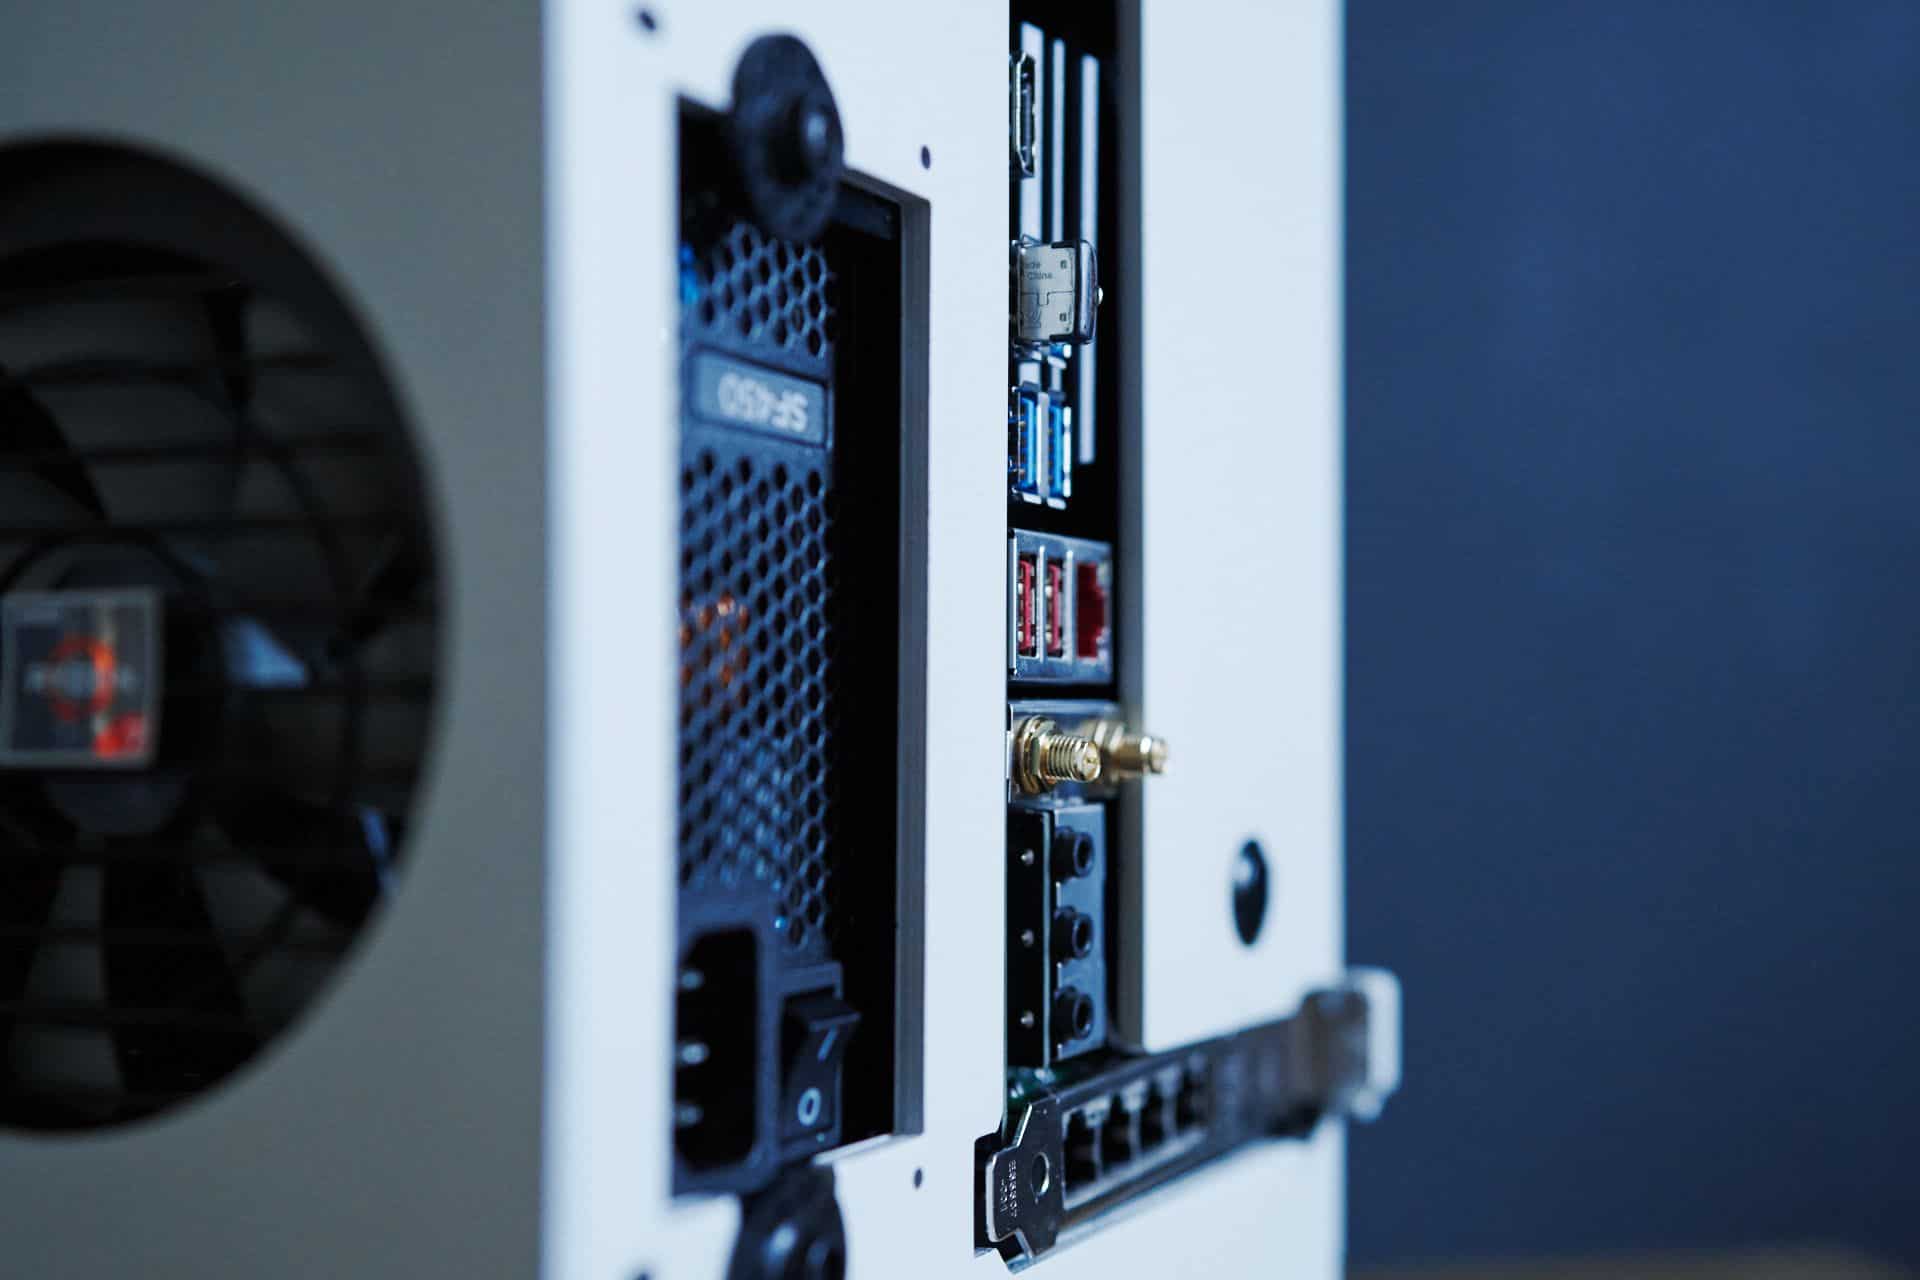
| PSU | Corsair SF450 450W SFX |
| PCIe slot | Intel I350-T4 |
The main reason behind moving from four Samsung 860 QVOs to four Seagate Barracudas was the huge discrepancy between the cost of a single 860 QVO and the actual performance it delivers as soon as its internal cache filled up. Since I was planning to work with data well beyond it’s internal cache size, I decided to scrap the 4TB SSDs and pick cheaper and therefore easier replaceable Barracudas. And regarding the performance, well, just keep on reading.
The Software
On the software side, I decided to stick with NixOS. In my opinion it’s absolutely the best Linux distribution to use for such a purpose. It’s lightweight, it’s reliable and most importantly it’s completely reproducible. Reproducibility is something you’ll learn to value as soon as hardware breaks down and needs quick replacement. And I can tell you that hardware breaking down isn’t an unlikely event for a device that’s being put through the constant stress of travel.
So, let’s have a closer look at the configuration.nix that I used for setting
up the whole system:
{ config, pkgs, ... }:

{
  boot.kernelPackages = pkgs.linuxPackages_latest;
  boot.initrd.availableKernelModules = [ "nvme" "xhci_pci" "ahci" "usb_storage" "usbhid" "sd_mod" ];
  boot.kernelModules = [ "kvm-amd" "vfio-pci" ];
  boot.extraModulePackages = [ ];

  boot.loader.systemd-boot.enable = true;
  boot.loader.grub.enable = true;
  boot.loader.grub.version = 2;
  boot.loader.grub.device = "nodev";
  boot.loader.grub.efiSupport = true;
  boot.loader.efi.canTouchEfiVariables = true;
  boot.loader.grub.gfxmodeEfi = "800x600";
  boot.initrd.luks.devices."h4nk4" = {
    device = "/dev/disk/by-uuid/bf3b68d7-6373-4f43-b659-998be2cfe84f";
    preLVM = true;
    allowDiscards = true;
    keyFileSize = 4096;
    keyFile = "/dev/disk/by-id/usb-SanDisk_Cruzer_Fit_4C530011610530103500-0:0";
  };
  boot.initrd.luks.devices."cache" = {
    device = "/dev/disk/by-uuid/2a87bf13-803b-4bdb-993d-8c4609ef0bc0";
    preLVM = true;
    allowDiscards = true;
    keyFileSize = 4096;
    keyFile = "/dev/disk/by-id/usb-SanDisk_Cruzer_Fit_4C530011610530103500-0:0";
  };
  boot.initrd.luks.devices."storage" = {
    device = "/dev/disk/by-uuid/e8b5bae6-8de0-4906-a649-b0cb17cbecef";
    preLVM = true;
    allowDiscards = false;
    keyFileSize = 4096;
    keyFile = "/dev/disk/by-id/usb-SanDisk_Cruzer_Fit_4C530011610530103500-0:0";
  };

  fileSystems = {
    "/" = {
      device = "/dev/disk/by-label/root";
      fsType = "ext4";
      options = [ "noatime" "nodiratime" "discard" ];
    };
    "/boot" = {
      device = "/dev/nvme0n1p2";
      fsType = "vfat";
    };
    "/storage" = {
      device = "/dev/disk/by-id/dm-name-vg--cached--storage-storage";
      fsType = "ext4";
    };
  };

  swapDevices = [
    {
      device = "/dev/disk/by-label/swap";
    }
  ];

  networking.hostName = "h4nk4";
  networking.defaultGateway = "10.0.0.1";
  networking.nameservers = [ "10.0.0.1" "1.1.1.1" "8.8.8.8" ];
  networking.interfaces.enp4s0.ipv4.addresses = [ {
    address = "10.0.0.2";
    prefixLength = 24;
  } ];
  networking.bridges = {
    br0.interfaces = [ "enp9s0f1" "enp9s0f2" "enp9s0f3" ];
  };
  networking.wireless.enable = true;
  networking.firewall.enable = false;

  security.pam.services.sshd.showMotd = true;
  users.motd = ''

  {__     {__      {_       {___     {__{__   {__        {_
  {__     {__     {_ __     {_ {__   {__{__  {__        {_ __
  {__     {__    {_  {__    {__ {__  {__{__ {__        {_  {__
  {______ {__   {__   {__   {__  {__ {__{_ {_         {__   {__
  {__     {__  {__     {__  {__   {_ {__{__  {__     {__     {__
  {__     {__ {__       {__ {__    {_ __{__   {__   {__       {__
  {__     {__{__         {__{__      {__{__     {__{__         {__

           ___  ___ _________  __________  _______________
         / // / __ |/ / / __ / /__/ _//    / / / / _// , _/
        /____/_/ |_/_/ /_/ |_\___/___/_/|_/ /_/ /___/_/|_|


  '';

  time.timeZone = "UTC";

  environment.systemPackages = with pkgs; [
    wget
    vim
    screen
    tmux
    lm_sensors
    qemu
    vde2
    gitAndTools.gitFull
    curl
    zip
    unzip
    gnupg
    jq
    hdparm
    lsof
    tcpdump
    binutils-unwrapped
    iptables
    pciutils
    rsnapshot
    mailutils
  ];

  programs.zsh.enable = true;
  programs.zsh.ohMyZsh = {
    enable = true;
    plugins = [ "git" "python" "man" "screen" "tmux" "zsh-autosuggestions" "history" ];
    theme = "wezm";
  };

  services.openssh.enable = true;
  services.openssh.permitRootLogin = "no";

  services.openntpd.enable = true;

  services.cron = {
    enable = true;
    systemCronJobs = [
      "0  2  * * *      root    /opt/h4nk4-m/scripts/backup.sh daily"
    ];
  };

  services.avahi.enable = true;
  services.avahi.ipv4 = true;
  services.avahi.ipv6 = false;
  services.avahi.publish.enable = true;
  services.avahi.publish.hinfo = false;
  #services.avahi.publish.userServices = true;
  services.avahi.publish.workstation = false;
  services.avahi.publish.addresses = true;
  services.avahi.publish.domain = true;
  services.avahi.nssmdns = true;
  services.avahi.browseDomains = ["domain.lan"];
  services.avahi.wideArea = true;
  services.avahi.extraServiceFiles = {
    smb = ''
      <?xml version="1.0" standalone='no'?>
      <!DOCTYPE service-group SYSTEM "avahi-service.dtd">
      <service-group>
       <name replace-wildcards="yes">%h</name>
       <service>
         <type>_smb._tcp</type>
         <port>445</port>
       </service>
       <service>
         <type>_device-info._tcp</type>
         <port>0</port>
         <txt-record>model=MacPro6,1</txt-record>
       </service>
       <service>
         <type>_adisk._tcp</type>
         <txt-record>sys=waMa=0,adVF=0x100</txt-record>
         <txt-record>dk0=adVN=Time Machine,adVF=0x82</txt-record>
       </service>
      </service-group>
    '';
  };

  users.users.root = {
    shell = pkgs.zsh;
    openssh.authorizedKeys.keys = [ ... ];
  };

  users.users.mrus = {
    shell = pkgs.zsh;
    isNormalUser = true;
    home = "/storage/home/mrus";
    description = "Marius";
    extraGroups = [ "wheel" "libvirtd" "docker" ];
    openssh.authorizedKeys.keys = [ ... ];
  };

  system.stateVersion = "19.03";

  virtualisation.libvirtd.enable = true;
  virtualisation.docker.enable = true;
  virtualisation.docker.liveRestore = false; # This option is not compatible with docker swarm

  services.samba = {
    enable = true;
    securityType = "user";
    syncPasswordsByPam = true;
    extraConfig = ''
      server string = h4nk4
      workgroup = WORKGROUP
      log file = /var/log/samba/log.%m
      max log size = 1000
      logging = file
      log level = 1
      server role = standalone server
      obey pam restrictions = yes
      map to guest = bad user
      dns proxy = no
      wide links = yes
      unix extensions = no
      follow symlinks = yes
      acl allow execute always = yes
      socket options = TCP_NODELAY IPTOS_LOWDELAY SO_RCVBUF=524288 SO_SNDBUF=524288
      usershare allow guests = no
      mdns name = mdns
      vfs objects = catia fruit streams_xattr
      fruit:aapl = yes
      fruit:model = MacPro6,1
      fruit:advertise_fullsync = true
      spotlight = yes
      rpc_server:mdsvc = embedded
    '';
    shares = {
      "Archive" = {
        "comment" = "Archive";
        "path" = "/storage/archive";
        "guest ok" = "no";
        "writable" = "yes";
        "browseable" = "yes";
        "read only" = "no";
        "create mask" = "0775";
        "directory mask" = "0775";
        "valid users" = "mrus";
      };
      "Media" = {
        "comment" = "Media";
        "path" = "/storage/media";
        "guest ok" = "no";
        "writable" = "yes";
        "browseable" = "yes";
        "read only" = "no";
        "create mask" = "0775";
        "directory mask" = "0775";
        "valid users" = "mrus";
      };
      "Projects" = {
        "comment" = "Projects";
        "path" = "/storage/projects";
        "guest ok" = "no";
        "writable" = "yes";
        "browseable" = "yes";
        "read only" = "no";
        "create mask" = "0775";
        "directory mask" = "0775";
        "valid users" = "mrus";
      };
      "Time Machine" = {
        "comment" = "Time Machine";
        "path" = "/storage/timemachine/%U";
        "guest ok" = "no";
        "valid users" = "%U";
        "browseable" = "no";
        "writeable" = "yes";
        "ea support" = "yes";
        "read only" = "no";
        "durable handles" = "yes";
        "kernel oplocks" = "no";
        "kernel share modes" = "no";
        "posix locking" = "no";
        "create mask" = "0600";
        "directory mask" = "0700";
        "vfs objects" = "catia fruit streams_xattr";
        "fruit:time machine" = "yes";
        "fruit:metadata" = "netatalk";
        "fruit:encoding" = "native";
        "fruit:time machine max size" = "4T";
        "fruit:veto_appledouble" = "yes";
        "inherit acls" = "yes";
      };
    };
  };
}
I won’t go through every single line to explain what it does, not only because
NixOS has a damn good manual where you could
read up on any of these settings, but also because you could simply fill all
openssh.authorizedKeys.keys with valid keys and test it out on your own.
The only part that is not 100% reproducible yet is the MD/LVM setup that I used
for the root filesystem and the actual storage. These things need to be set up
previous to running the nixos-install command from the live installation
medium. You can google for nixos mdadm raid1
root (or something
like that) to find out how to set up a RAID1 for your system root. The storage
part is a bit trickier though, because it does some nifty stuff.
What I’ve done was, that I split the RAID1 that uses the on-board NVMe SSDs into two parts: One for the system (which consists of two mounts for root and swap; boot is available on both SSDs individually) and the other one for the storage. Then, I set up the storage as follows:
First, I configured the RAID10 across all four storage HDDs:
mdadm --create /dev/md128 --level=10 --raid-devices=4 /dev/sda1 /dev/sdb1 /dev/sdd1 /dev/sde1
Then, I set up caching utilising the second part of the NVMe SSD RAID1 setup from before. Caching? you ask. Yes, caching. Since the Barracudas are slow-spinning 2.5" drives, we’re going to use the same trick those cheeky bastards from Seagate did on their 4TB SSDs: We’re going to put an additional SSD cache in between. But instead of only ~50GB, our cache is going to be double that size.
pvcreate /dev/mapper/cache
# ...
pvcreate /dev/mapper/storage
# ...
vgcreate vg-cached-storage /dev/mapper/cache /dev/mapper/storage
# ...
lvcreate -l '100%FREE' -n storage vg-cached-storage /dev/mapper/storage
# ...
lvcreate -L 100M -n cache_meta vg-cached-storage /dev/mapper/cache
# ...
lvcreate -l '100%FREE' -n cache vg-cached-storage /dev/mapper/cache
# ...
lvreduce -L -100M vg-cached-storage/storage
# ...
lvconvert --type cache-pool --cachemode writethrough --poolmetadata vg-cached-storage/cache_meta vg-cached-storage/cache
# ...
lvconvert --type cache --cachepool vg-cached-storage/cache vg-cached-storage/storage
# ...
lvchange --cachemode writeback vg-cached-storage/storage
# ...
Now we have caching in place. From this point on, we can install NixOS using the configuration above and reboot into the installed system. Well, you probably won’t be able to, because you don’t have the SanDisk Cruzer USB stick that I used for storing the LUKS key that’s required to decrypt the system root, the swap, the cache and the storage. But you get the point, right?
Everything else within this configuration should be self-explanatory. There is KVM running, there is a Samba server that allows accessing a couple of shares and provides a TimeMachine backup target and there even is Oh My Zsh available!
The Virtualisation
KVM is an important part in my setup, as it allows me to run guests that take care of specific tasks. Maybe you might have noticed, that not all available ethernet interfaces were assigned within the configuration. The reason for this is that KVM passes the unassigned interfaces through to a pfSense guest (yes, it’s a FreeBSD running inside KVM and it works perfectly fine), which acts as a borderline firewall and filters the interface that’s attached to the internet – either directly or through an LTE modem – so that nothing bad goes into or out of the DMZ this system and all its internal clients represent.
In addition to pfSense, I have a couple of other guests that allow execution of
critical tasks in an environment with strong data separation. For all tasks that
don’t require to be strictly separated from the storage there is a Docker engine
running as a swarm node. For example the Resilio Sync peer runs on that Docker
node, with access to specific areas within the storage.
Crucial KVM guests and Docker services, like the pfSense or Resilio Sync, are configured to boot automatically during system startup, which makes the whole device completely reboot-safe. And as soon as everything is up and running I can simply remove the USB stick that contains the LUKS key, so that even if someone was to break into my Airbnb or hotel room and steal this device, he or she would get no value at all from the data on it. In order to steal it, it would need to be disconnected from power, which would make it turn off and conversely require the USB stick during the next boot in order to decrypt each and every mount.
As for the data itself, I’m using a two-stage backup plan in which the most crucial data gets backed-up on a daily basis onto an external 2.5" drive, while all data is being backed-up on a weekly basis onto a storage bucket online. I use Duplicacy for backing up all data and both backups are fully encrypted.
The Summary
All things considered this setup turned out to be very reliable, efficient and versatile while aesthetically and acoustically pleasing, even in clean and silent environments. However, with AMD releasing more efficient and compact hardware – speaking about the recently released 7nm Ryzen 4000 mobile processors and future versions on the 14nm Ryzen V1000 and R1000 embedded units – this build of my Ultra-Portable Data Center is another update but definitely not an end result. I’m going to re-iterate on the design and the hardware and hopefully be able to downsize this setup even further, without compromising on performance and versatility.
Is there something I miss on this build? Well, a high-perfromance graphics processor that would greatly improve AI-related tasks is one thing I’m definitely looking forward to introduce into the next interation.
Enjoyed this? Support me via Monero, Bitcoin, Lightning, or Ethereum! More info.