Running an Open Source Home Area Network
Insights on running a Home Area Network (HAN) nearly completely on open source software, including configurations and metrics.

Over the past year or so I began to replace everything around me with more privacy-respecting, open source software. Not only have I left macOS for Linux, I have also started to move away from closed source products towards with open alternatives.
While there are some areas, where it’s not yet possible to get entirely rid of closed source software (for example firmware blobs for proprietary hardware), I have nevertheless managed to move most parts that I directly interact with to open source software – and even optimized some components along the way, to better fit my needs and be more lightweight and thereby more portable.
a0i: Router, Firewall & WiFi Access Point
A router is the entrypoint of every local or home area network (LAN/HAN). Almost everywhere I lived, whether it was a lease, an Airbnb or a hotel, there usually was a router around that provided internet access through WiFi or ethernet cable. For leases and Airbnbs, these devices were usually ISP-branded equipment that the providers installed and maintained. Connecting personal devices to such equipment comes with certain risks. This type of hardware is usually locked-down by the IPS and runs closed source software not only by the provider, but also by the manufacturer of the hardware. Oftentimes, these routers are set up in ways in which they make it easily possible for the ISP’s technicians to hop onto them and check the settings in case there’s something wrong with connectivity.
I currently have one of these devices, connected to the coaxial cable that’s coming out of my wall. This router has an integrated cable modem, manages the internet uplink, acts as a WiFi access point and does other fancy things. Things I have no control over, simply because the ISP won’t let me access anything other than a status page that only shows me the uplink status.
The network this device establishes is not any more private or
trustworthy than for example a Starbucks public WiFi network. In order to keep
a home area network (HAN) safe, one needs to have a trusted network that’s
separate from the 192.168.0.0/24 things like this set up.
That’s where a0i comes in.
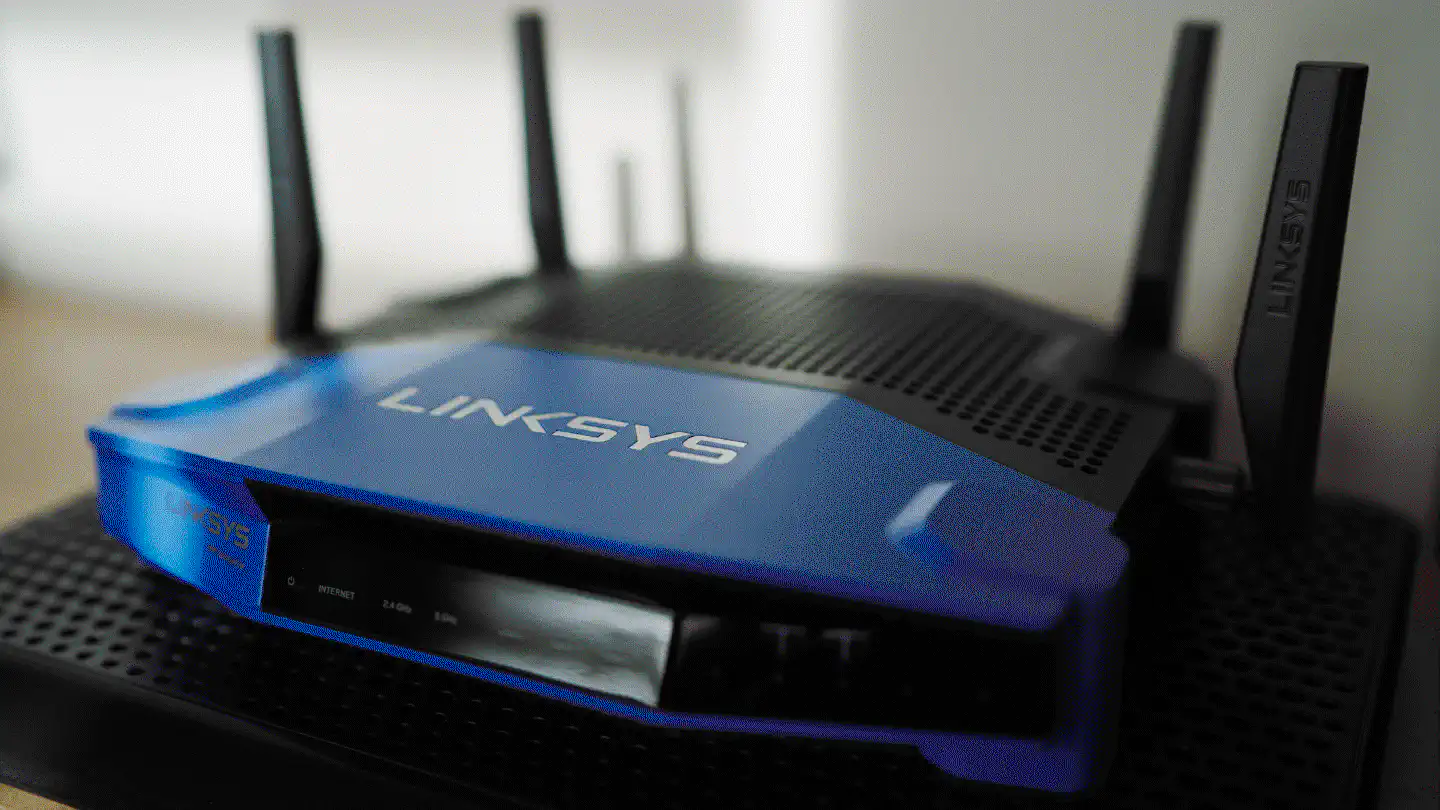
The centrepiece of my HAN is a Linksys WRT3200ACM running OpenWrt. It’s the
gateway to the outside world and offers 5GHz 802.11ac connectivity to every
device that I can’t connect using an ethernet cable. It’s using a fixed, 80 MHz
wide channel and transmits at 14 dBm (25 mW). I set the AP to a fixed channel,
because my WiFi clients sporadically lost connectivity and weren’t able to
reconnect in auto channel mode.
Update 2024-08-22
OpenWRT 23.05.2 appears to have fixed the WiFi connectivity issues.
Update 2022-12-28
Starting with OpenWRT 22.03 I have experienced regular WiFi connectivity issues on the WRT3200ACM. If you’re still running 21.02 it’s probably better to not upgrade to 22.03 and rather wait for the next stable.
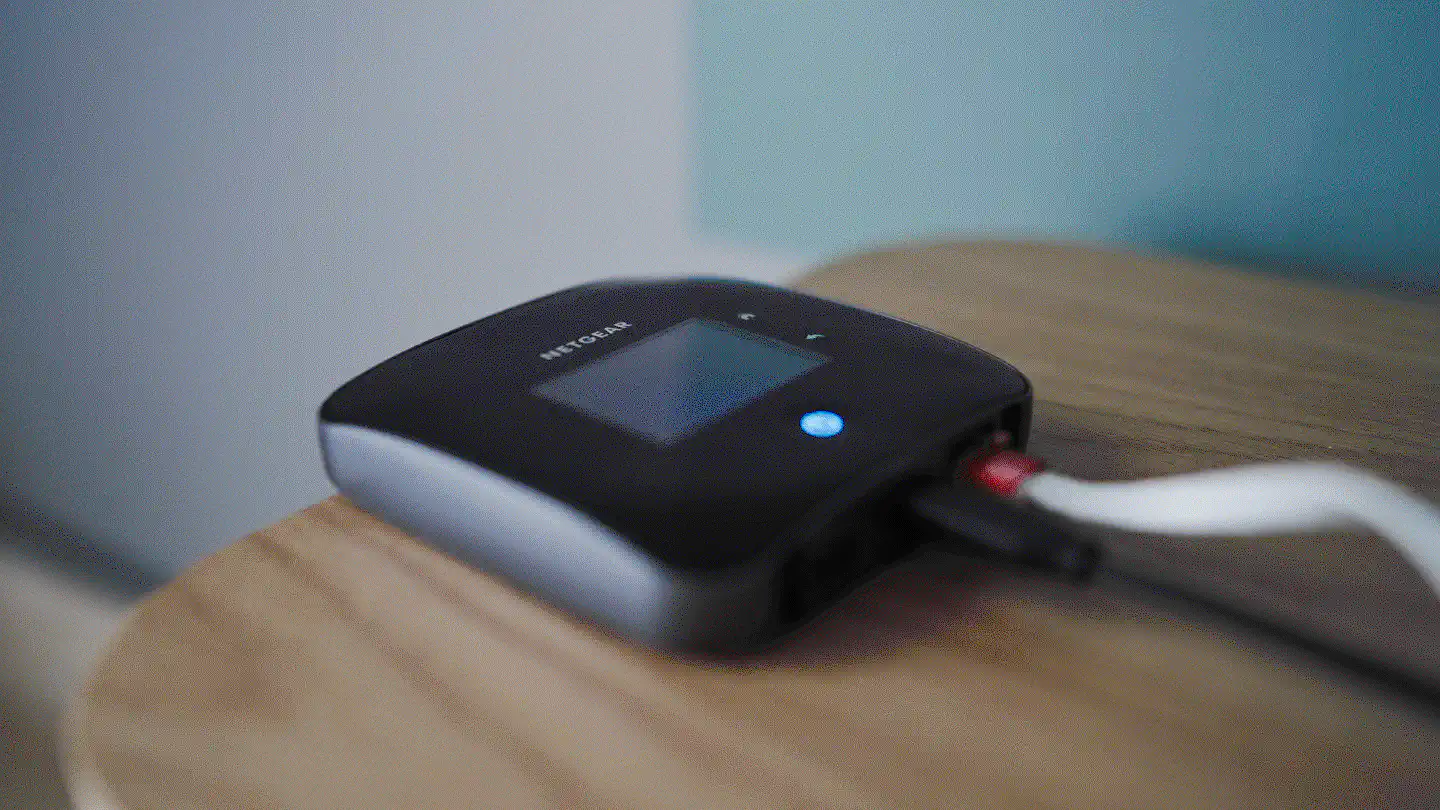
The WAN port of the router is connected to the ISP’s cable modem/router and basically acts like a single client device, requesting a dynamic IP from the modem. While this double-NAT setup isn’t ideal, it allows me to safely connect to any ISP device, no matter whether that’s an LTE router, a cable or DSL modem or an ONU. In fact, at times when cable connectivity becomes unbearable, I make use of OpenWrt’s mwan3 packages to run a failover multi-WAN configuration across cable and LTE. In that case I simply connect my Netgear Nighthawk – a piece of hardware I’m still working to transition to an open source alternative like a Raspberry Pi LTE router – to one of the other ethernet ports on the Linksys and configure mwan3 accordingly.
Even though the Linksys WRT3200ACM was released back in 2016, it’s still a solid and well-supported option for OpenWrt – unless WiFi is your primary requirement. The Marvell 88W8964 driver for Linux isn’t exactly the best supported/most actively developed and while 5GHz WiFi works fairly well when configured properly (e.g. using a fixed channel) it won’t be the best option when a significant number of devices, that transfer large amounts of data, are connected. On average I have around six active WiFi clients, with maybe two of them transferring a noticeable amount of data. The average WiFi throughput is around 350Mb/s, with only short peaks sporadically topping out at roughly 700Mb/s.

Since the WRT3200ACM only offers roundabout 55 megabytes of usable storage I
keep packages at a minimum. Most software is OpenWrt base, with the exception of
collectd (plus modules), mwan3 and dnscrypt-proxy2, which I had installed
manually. While I would like to install e.g. Wireguard, to be able to run
multiple clients on the Linksys, the hardware simply isn’t powerful enough to
handle it.
dnscrypt-proxy2 is the DNS server every HAN client uses. It is configured to
use a predefined set of public resolvers, as well as a dynamic list of
anonymized DNS relays and Oblivious DoH servers and relays.
With ambient temperatures around 26°C, the system temperature of the Linksys has usually been between 65°C and 75°C, which is why I got one of these cheap laptop coolers. It has two 80mm fans that draw power from the Linksys' USB port and push air upwards. Since the router case has holes on the bottom and the top, the additional air flow cools the internal electronics down to 46°C on average.
r0n1n: Docker Host & IoT Gateway
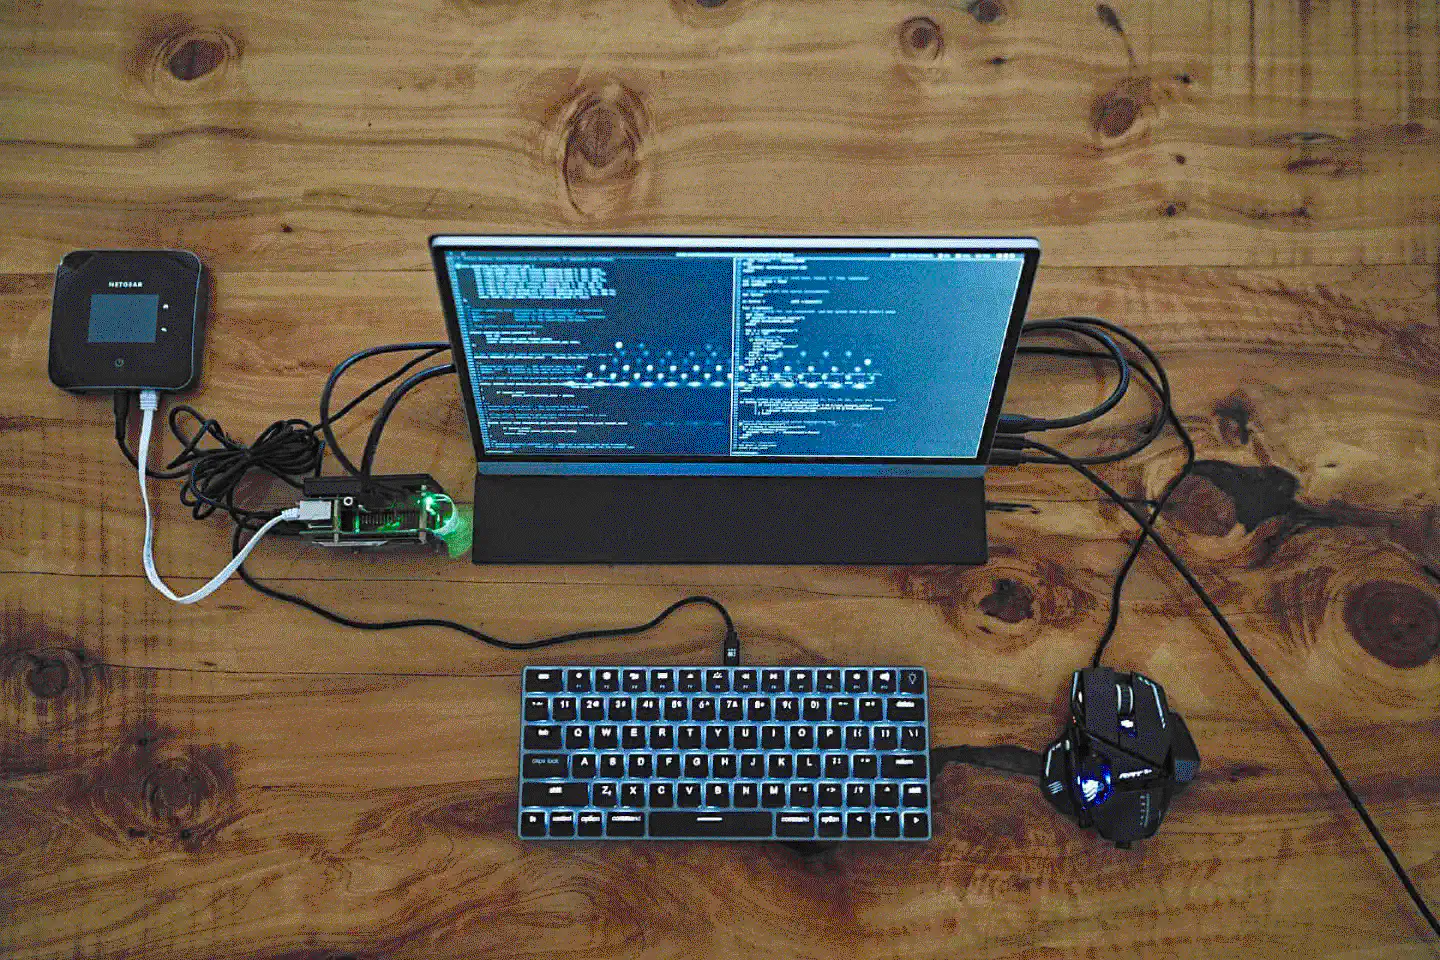
Up until I switched back to Linux on my workstation,
r0n1n was my primary Linux machine. It’s a Rock Pi 4A with a Rockchip RK3399,
a Mali T860MP4 GPU, 4GB LPDDR4 3200 Mhz RAM and an extension board that allowed
me to connect a 512 GB WD Black Gen 3 NVMe to it. The SBC has a big ass heatsink
attached to the RK3399 that helps keeping it around 50°C, without a fan.
With the Rock Pi supporting USB PD, it was easily possible to run the SBC as well as the UPERFECT 15.6-inch portable UHD display off a 45W power brick for extended periods of time. By attaching it to my Netgear Nighthawk LTE router, it basically became a modular, portable computer that one could work with anywhere, independent of WiFi or power outlets. And thanks to the NVMe, IO was blazing fast.

After I built my SFFPC, however, I had no more use for the Rock Pi 4 as a
Linux desktop, so I decided to rebuild r0n1n and make it a tiny HAN server.
These days r0n1n’s main purpose is running Docker containers and acting as a
gateway for IoT devices (e.g. a Raspberry Pi Zero W camera or ESP32s with
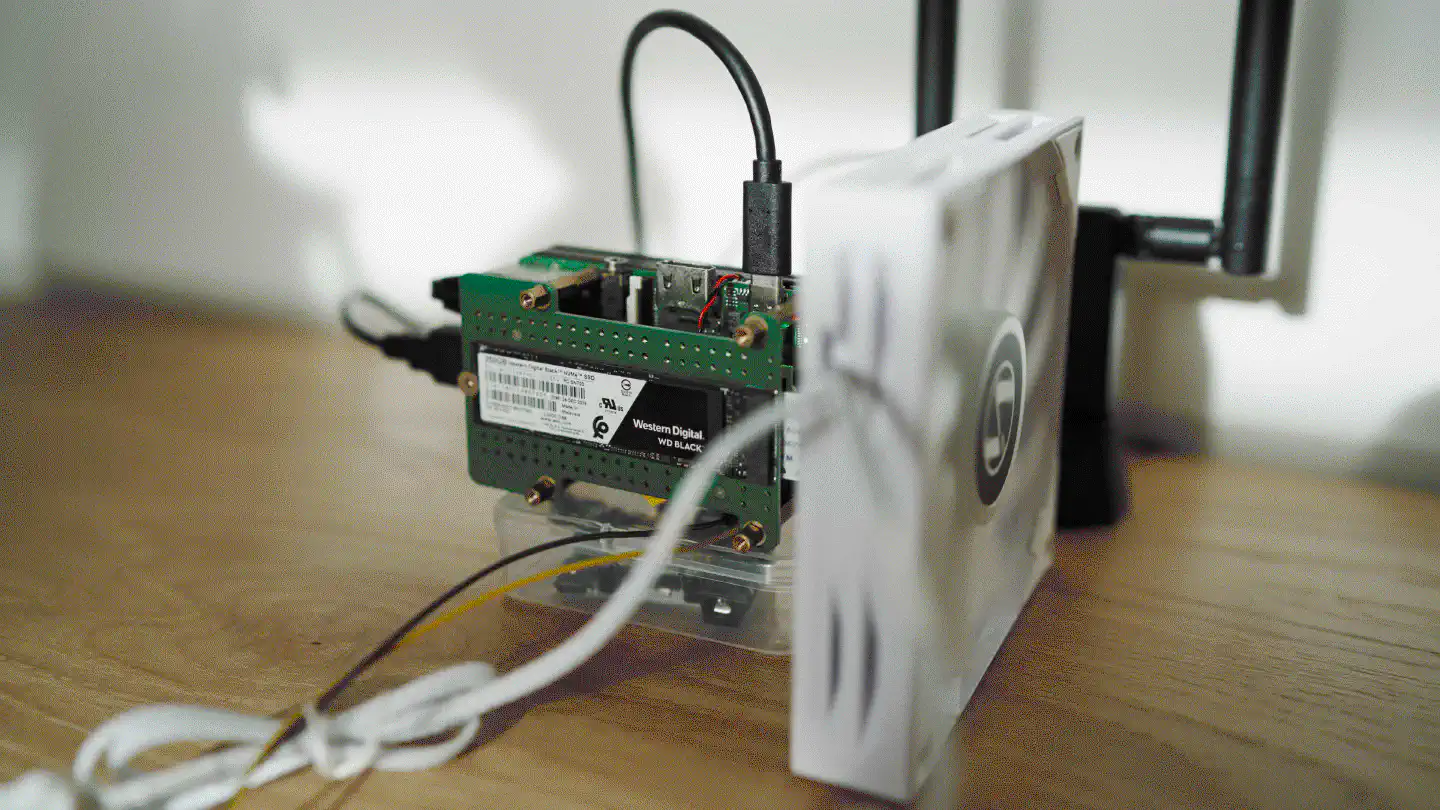
sensors). In order to optimize performance and longevity of the components I
connected an unused Lian Li 120mm 12V fan to the Rock Pi’s 5V output. The lower
voltage makes it run slower (and therefore more silent) than it usually would,
while still providing enough air flow to cool the RK3399 to 31°C and the
NVMe to 35°C (under normal load). Compared to the PinePhone Pro, which
also runs (a special variant of) the RK3399, these thermals are ridiculously
good – especially in an environment with ambient temperatures around 26°C.
I might nevertheless install a NVMe heatsink.
Performance

Even under heavy load from building Docker images and compiling Go code, the Rock Pi 4 performs extraordinary well and doesn’t lose a sweat. Compared to a Raspberry Pi 4 that has the same amount of RAM and an external SSD connected via USB, the Rock Pi’s RK3399 can handle significantly more load than the Pi’s Broadcom chip.
WiFi Access Point (systemd and hostapd)
r0n1n is running Manjaro Linux off of its NVMe SSD. Since the Rock Pi 4A
does not have integrated WiFi (nor Bluetooth), I attached a Panda PAU09 N600
WiFi USB adapter to it and configured hostapd and systemd-networkd to bridge
WiFi clients into the main HAN, where they’re being assigned an IP address by
a0i. The reason for using a dedicated access point for all IoT devices/sensors
is the fact that most of these devices don’t support the 5GHz band and I
wouldn’t want to decrease wireless stability on a0i by enabling the 2.4GHz
frequency. Besides of this, since most sensors only communicate with Docker
containers running on r0n1n, this approach allows me to better limit their
access into the internal network.

Since the Panda PAU09 N600 works out of the box, the only thing needed to
enable the WiFi access point is a working hostapd configuration:
[root@r0n1n ~]# bat /etc/hostapd/hostapd.conf
───────┬────────────────────────────────────────────────────────────────────────
       │ File: /etc/hostapd/hostapd.conf
───────┼────────────────────────────────────────────────────────────────────────
   1   │ interface=wlan0
   2   │ bridge=br0
   3   │ driver=nl80211
   4   │ logger_syslog=-1
   5   │ logger_syslog_level=2
   6   │ logger_stdout=-1
   7   │ logger_stdout_level=2
   8   │ ctrl_interface=/run/hostapd
   9   │ ctrl_interface_group=0
  10   │ ssid=YOUR-SSID-HERE
  11   │ country_code=US
  12   │ hw_mode=g
  13   │ channel=7
  14   │ beacon_int=100
  15   │ dtim_period=2
  16   │ max_num_sta=10
  17   │ rts_threshold=-1
  18   │ fragm_threshold=-1
  19   │ macaddr_acl=0
  20   │ auth_algs=1
  21   │ ignore_broadcast_ssid=0
  22   │ wmm_enabled=1
  23   │ wmm_ac_bk_cwmin=4
  24   │ wmm_ac_bk_cwmax=10
  25   │ wmm_ac_bk_aifs=7
  26   │ wmm_ac_bk_txop_limit=0
  27   │ wmm_ac_bk_acm=0
  28   │ wmm_ac_be_aifs=3
  29   │ wmm_ac_be_cwmin=4
  30   │ wmm_ac_be_cwmax=10
  31   │ wmm_ac_be_txop_limit=0
  32   │ wmm_ac_be_acm=0
  33   │ wmm_ac_vi_aifs=2
  34   │ wmm_ac_vi_cwmin=3
  35   │ wmm_ac_vi_cwmax=4
  36   │ wmm_ac_vi_txop_limit=94
  37   │ wmm_ac_vi_acm=0
  38   │ wmm_ac_vo_aifs=2
  39   │ wmm_ac_vo_cwmin=2
  40   │ wmm_ac_vo_cwmax=3
  41   │ wmm_ac_vo_txop_limit=47
  42   │ wmm_ac_vo_acm=0
  43   │ eapol_key_index_workaround=0
  44   │ eap_server=0
  45   │ own_ip_addr=127.0.0.1
  46   │ wpa=2
  47   │ wpa_key_mgmt=WPA-PSK
  48   │ wpa_passphrase=YOUR-PASSPHRASE-HERE
  49   │ wpa_pairwise=CCMP
───────┴────────────────────────────────────────────────────────────────────────
The configuration for bridging the WiFi clients into the internal network
consist of four files under /etc/systemd/network/:
[root@r0n1n ~]# bat /etc/systemd/network/*
───────┬────────────────────────────────────────────────────────────────────────
       │ File: /etc/systemd/network/10-br0.netdev
───────┼────────────────────────────────────────────────────────────────────────
   1   │ [NetDev]
   2   │ Name=br0
   3   │ Kind=bridge
   4   │ MACAddress=00:00:00:00:00:00
───────┴────────────────────────────────────────────────────────────────────────
───────┬────────────────────────────────────────────────────────────────────────
       │ File: /etc/systemd/network/20-br0.network
───────┼────────────────────────────────────────────────────────────────────────
   1   │ [Match]
   2   │ Name=br0
   3   │
   4   │ [Network]
   5   │ MulticastDNS=yes
   6   │ DHCP=yes
───────┴────────────────────────────────────────────────────────────────────────
───────┬────────────────────────────────────────────────────────────────────────
       │ File: /etc/systemd/network/21-eth0_br0.network
───────┼────────────────────────────────────────────────────────────────────────
   1   │ [Match]
   2   │ Name=eth0
   3   │
   4   │ [Network]
   5   │ Description=Add eth0 to br0
   6   │ Bridge=br0
───────┴────────────────────────────────────────────────────────────────────────
───────┬────────────────────────────────────────────────────────────────────────
       │ File: /etc/systemd/network/21-wlan0_br0.network
───────┼────────────────────────────────────────────────────────────────────────
   1   │ [Match]
   2   │ Name=wlan0
   3   │ WLANInterfaceType=ap
   4   │
   5   │ [Link]
   6   │ RequiredForOnline=no
   7   │
   8   │ [Network]
   9   │ Description=Add wlan0 to br0
  10   │ Bridge=br0
───────┴────────────────────────────────────────────────────────────────────────
What we’re doing here is basically:
- adding a netdev config
br0as abridge - adding a network config for
br0that requests its IP via DHCP
(make sure tosystemctl disable dhcpcd.service!) - adding a network config for bridging
eth0tobr0 - adding a network config for bridging
wlan0tobr0
The MACAddress in the [NetDev] section of 10-br0.netdev is supposed to set
the MAC address of br0 to a static address, so a0i always assigns it the
same IP address via DHCP.
In order to make the whole setup safe for reboot, we need a drop-in service
config for hostapd, because otherwise systemd will fail launching it
properly:
[root@r0n1n ~]# bat /etc/systemd/system/hostapd.service.d/hostapd.service
───────┬────────────────────────────────────────────────────────────────────────
       │ File: /etc/systemd/system/hostapd.service.d/hostapd.service
───────┼────────────────────────────────────────────────────────────────────────
   1   │ [Unit]
   2   │ BindsTo=sys-subsystem-net-devices-wlan0.device
───────┴────────────────────────────────────────────────────────────────────────
We also need to systemctl disable hostapd.service and instead do the
following:
mkdir /etc/systemd/system/sys-subsystem-net-devices-wlan0.device.wants
ln -s /usr/lib/systemd/system/hostapd.service /etc/systemd/system/sys-subsystem-net-devices-wlan0.device.wants/
Docker
Besides acting as a 2.4GHz access point for IoT devices, the Rock Pi is running
a variety of different services as Docker containers. One pitfall here is that
Docker likes to mess around with iptables, leading to WiFi clients being
unable to communicate with the internal network. In order to fix this, another
drop-in configuration is needed:
[root@r0n1n ~]# bat /etc/systemd/system/docker.service.d/10-post.conf
───────┬────────────────────────────────────────────────────────────────────────
       │ File: /etc/systemd/system/docker.service.d/10-post.conf
───────┼────────────────────────────────────────────────────────────────────────
   1   │ [Service]
   2   │ ExecStartPost=iptables -I DOCKER-USER -i src_if -o dst_if -j ACCEPT
───────┴────────────────────────────────────────────────────────────────────────
Update: Because I simply couldn’t get it working with this rule, that was suggested in the Docker docs in first place, I eventually gave up and used a jackhammer to fix it:
[root@r0n1n ~]# bat /etc/systemd/system/docker.service.d/20-post.conf
───────┬────────────────────────────────────────────────────────────────────────
       │ File: /etc/systemd/system/docker.service.d/20-post.conf
───────┼────────────────────────────────────────────────────────────────────────
   1   │ [Service]
   2   │ ExecStartPost=iptables --policy FORWARD ACCEPT
───────┴────────────────────────────────────────────────────────────────────────
On a different note, if I would have tried to run Gentoo on the Rock Pi 4, I
definitely wouldn’t have used systemd. While the steps described here might
seem straightforward, it was a gigantic PITA to figure out the details and get
the setup running. If I would have done it on a vanilla OpenRC Gentoo
installation, I probably would have spent far less time dealing with
configuration and debugging, and more time doing the things that are actually
fun: Watching emerge compile packages. I never had particularly strong
opinions on systemd, mainly because I rarely had to deal with it, but every
time I did, the sheer overkill for configuring the most mundane things killed the
vibe pretty quickly, making me start to understand why people
hate systemd so passionately.
Services
With over 500GB of storage and plenty of RAM available, the Rock Pi is capable of running a good amount of Docker containers. And while it certainly would have been possible to roll my own Kubernetes for the sake of 1337ness, Docker is just enough for the things I need.
I often try out new services and remove the ones I don’t end up using enough, but there are also a handful of core services that are always there. None of these services are accessible from outside the HAN – not because it wouldn’t be possible, but because they don’t need to be. If data has to be made available outside this network, the services will periodically push it to a cloud instance, which serves it to external clients.
Grafana (and InfluxDB, and Telegraf)
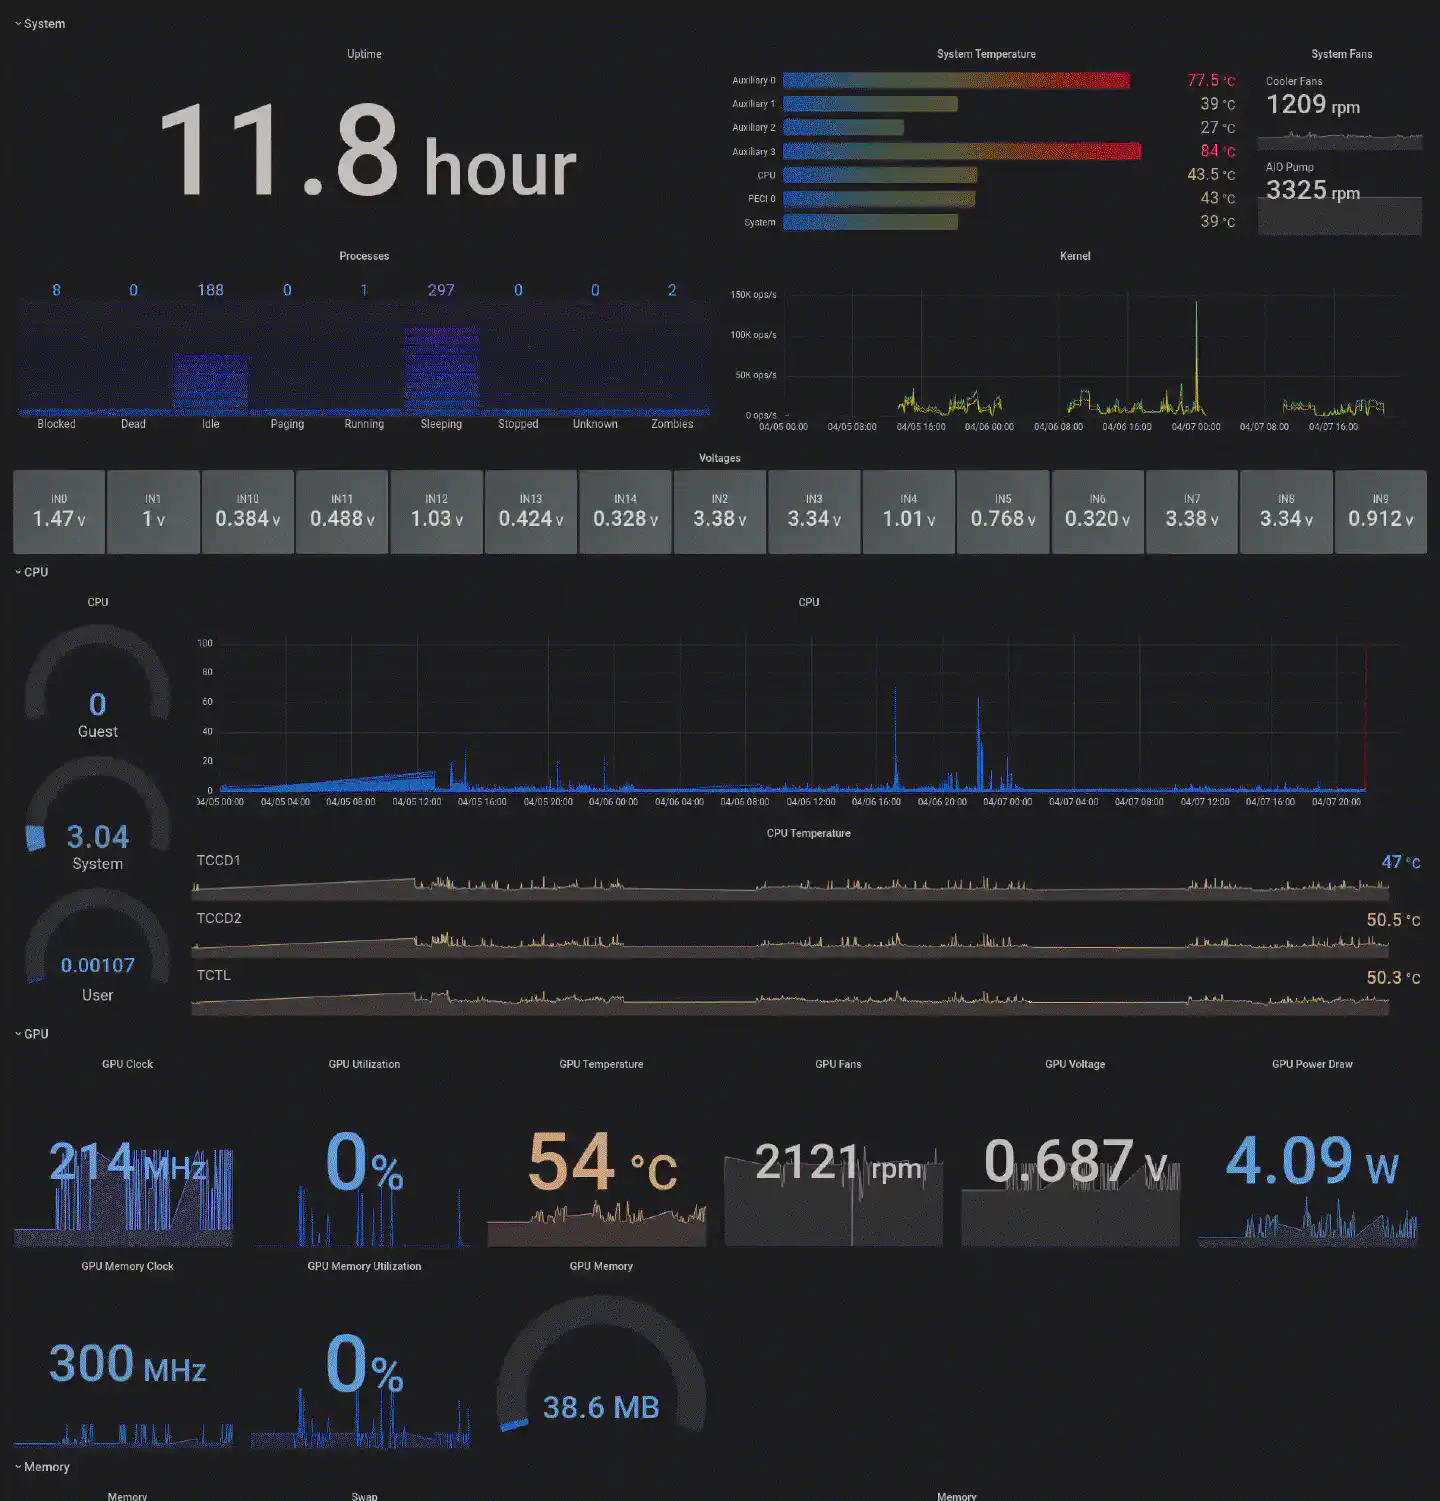
One group of such core services consists of InfluxDB, Telegraf and Grafana.
InfluxDB is the data source for Grafana, towards which all IoT sensors and other
devices write their data. a0i for example runs collectd to collect
performance data from the Linksys, which it sends to InfluxDB. Since the Linksys
has too little storage to run an actual Telegraf node on it, collectd is
collecting the raw data and posting it to the Telegraf container that is running
on r0n1n. The Telegraf node then pumps the data into InfluxDB. The
configuration for that looks like this:
[root@r0n1n ~]# bat /home/pi/services/telegraf/telegraf.conf
───────┬────────────────────────────────────────────────────────────────────────
       │ File: /home/pi/services/telegraf/telegraf.conf
───────┼────────────────────────────────────────────────────────────────────────
   1   │ [global_tags]
   2   │
   3   │ [agent]
   4   │   interval = "10s"
   5   │   round_interval = true
   6   │   metric_batch_size = 1000
   7   │   metric_buffer_limit = 10000
   8   │   collection_jitter = "0s"
   9   │   flush_interval = "10s"
  10   │   flush_jitter = "0s"
  11   │   precision = ""
  12   │   hostname = "pr0xy"
  13   │   omit_hostname = false
  14   │   logtarget = "stderr"
  15   │
  16   │ [[outputs.influxdb_v2]]
  17   │   urls = ["http://10.0.0.6:8086"]
  18   │   token = "YOUR-TOKEN-HERE"
  19   │   organization = "all-computers-are-bad"
  20   │   bucket = "root"
  21   │
  22   │ [[inputs.socket_listener]]
  23   │   service_address = "udp://:25826"
  24   │   data_format = "collectd"
  25   │   collectd_security_level = "none"
  26   │   collectd_parse_multivalue = "split"
  27   │   collectd_typesdb = ["/etc/telegraf/types.db"]
  28   │
  29   │ [[inputs.openweathermap]]
  30   │   app_id = "YOUR-TOKEN-HERE"
  31   │   city_id = ["0000000"]
  32   │
  33   │   lang = "en"
  34   │   fetch = ["weather", "forecast"]
  35   │   base_url = "https://api.openweathermap.org/"
  36   │   response_timeout = "20s"
  37   │   units = "metric"
  38   │   interval = "30m"
  39   │
  40   │ [[inputs.docker]]
  41   │   endpoint = "unix:///var/run/docker.sock"
  42   │   gather_services = false
  43   │   source_tag = false
  44   │   container_name_include = []
  45   │   container_name_exclude = []
  46   │   timeout = "5s"
  47   │   perdevice = true
  48   │   total = false
  49   │   docker_label_include = []
  50   │   docker_label_exclude = []
───────┴────────────────────────────────────────────────────────────────────────
This configuration, including the types.db it refers to (which can be
downloaded from the OpenWrt router, typically under
/usr/share/collectd/types.db) is mounted into the container on launch - just
like the docker.sock, that I’m using to retrieve additional data from the
Docker host:
docker run -d \
  -p 25826:25826/udp \
  -v /var/run/docker.sock:/var/run/docker.sock \
  -v $HOME/services/telegraf/telegraf.conf:/etc/telegraf/telegraf.conf:ro \
  -v $HOME/services/telegraf/types.db:/etc/telegraf/types.db:ro \
  --name telegraf \
  telegraf
Since r0n1n is already running a Telegraf node inside Docker and I wasn’t able
to find a Manjaro package for it to run another node on directly r0n1n, so
that it would have access to thermals and other system data, I decided to simply
compile collectd on the Rock Pi and have it running as a systemd service:
git clone --recurse-submodules https://github.com/collectd/collectd.git
cd collectd
./configure --prefix /usr --enable-python=false --enable-smart=true
make
su -
cd /home/pi/collectd/
make install
[root@r0n1n ~]# bat /etc/systemd/system/collectd.service
───────┬────────────────────────────────────────────────────────────────────────
       │ File: /etc/systemd/system/collectd.service
───────┼────────────────────────────────────────────────────────────────────────
   1   │ [Unit]
   2   │ Description=collectd
   3   │ After=network.target
   4   │
   5   │ [Service]
   6   │ Type=simple
   7   │ #User=root
   8   │ #Group=root
   9   │ WorkingDirectory=/root
  10   │ ExecStart=/usr/bin/collectd -f -C /etc/collectd.conf
  11   │ Restart=on-failure
  12   │
  13   │ [Install]
  14   │ WantedBy=default.target
───────┴────────────────────────────────────────────────────────────────────────
In the collectd.conf I configured the network plugin to report data to the
Telegraf node, similarly to how it is done on a0i – with the only
difference being the IP, since collectd can simply access the Docker container
via 127.0.0.1:
<Plugin network>
        Server "127.0.0.1" "25826"
        Forward false
        ReportStats true
</Plugin>
PostgreSQL
r0n1n runs the official postgres:alpine Docker image to offer a PostgreSQL
database to other services on r0n1n or cbrspc7.
The configuration is fairly vanilla and nothing special, since the service
doesn’t experience much load.
Redis
Similar to PostgreSQL, r0n1n runs an instance of redis:alpine
for other services to use. The instance is ephemeral as it does not contain any
data that has to be persisted.
ejabberd
Another service that’s a resident on r0n1n is ejabberd. It’s a Jabber server
written in Erlang. I use it for developing and testing XMPP-based protocols as
well as integration of local notifications. The server does not federate with
the outside world and is only available to devices inside the network.
Since there are no images for the linux/amr64/v8 platform yet, I had to
build those on my own:
git clone --recurse-submodules https://github.com/processone/docker-ejabberd
cd docker-ejabberd/mix/
docker build -t ejabberd/mix .
cd ../ecs/
docker build -t ejabberd/ecs .
journalist
journalist is my own RSS aggregator that I can use with either canard on the command line or any other client that supports the Fever API. It uses the PostgreSQL instance to store feeds and data.
IPFS
To browse IPFS from multiple devices without running an IPFS node on
every machine, I keep a single lowpower node running on r0n1n. On my
workstation and my phone I use the IPFS Firefox extension, which points to the
node running on the Rock Pi.
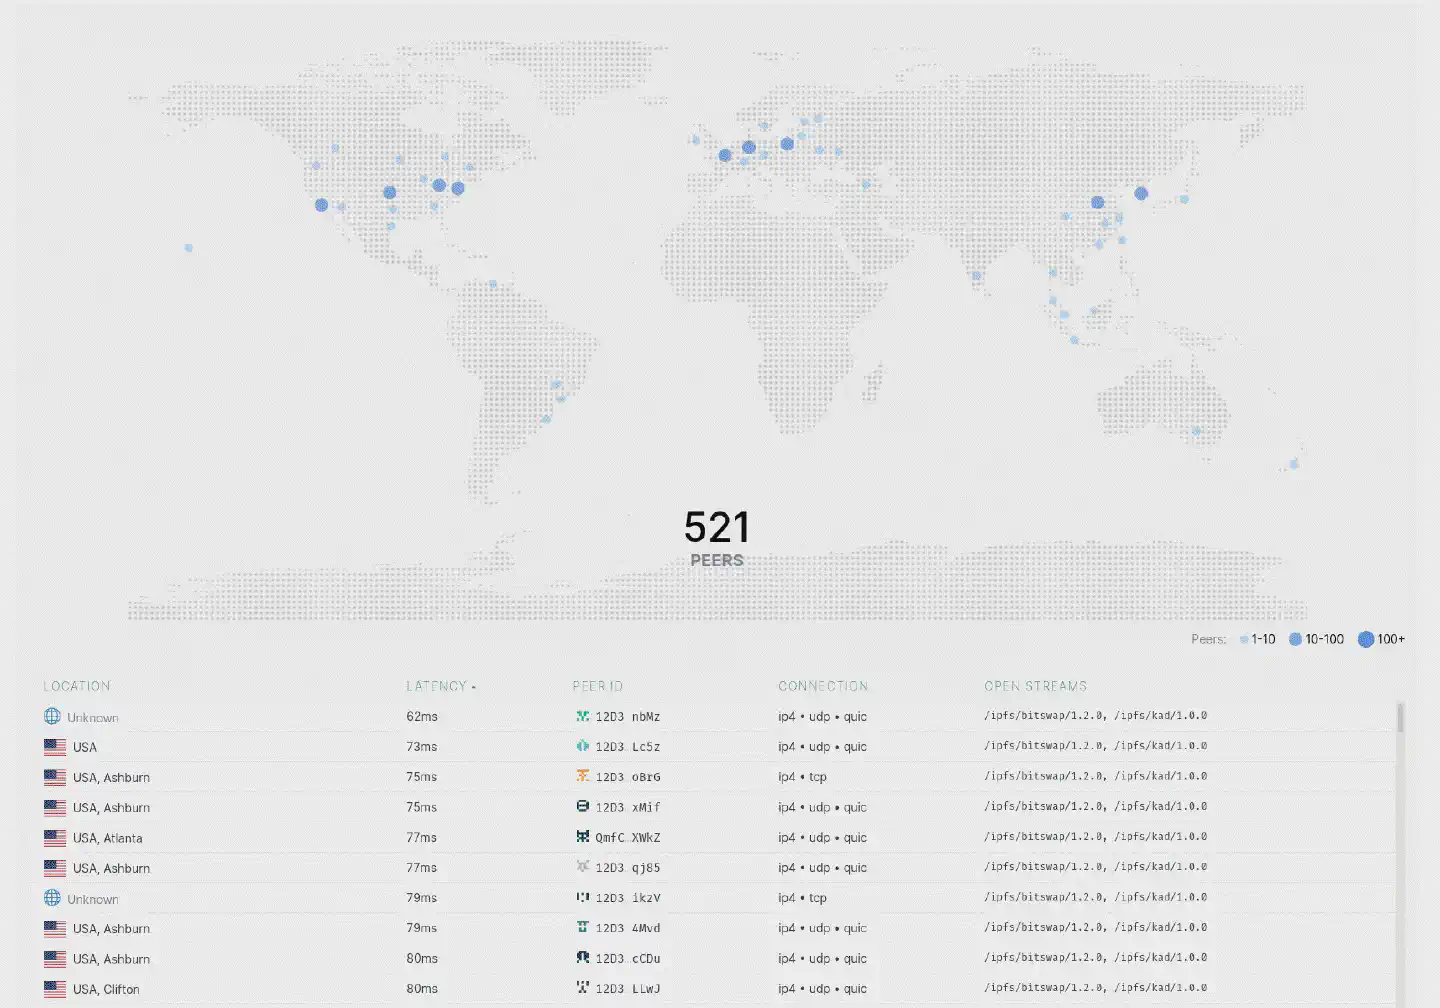
Just like the ejabberd project, the IPFS folks also do not offer an
linux/arm64/v8 image, so it needs to be built manually:
git clone --recurse-submodules https://github.com/ipfs/go-ipfs.git
cd go-ipfs
docker build -t ipfs/go-ipfs .
The IPFS node is then run using the lowpower profile:
docker run -d \
  --name ipfs \
  -e IPFS_PROFILE=lowpower \
  -v $HOME/services/ipfs/export:/export \
  -v $HOME/services/ipfs/ipfs:/data/ipfs \
  -p 4001:4001 \
  -p 8080:8080 \
  -p 5001:5001 \
  ipfs/go-ipfs:latest
In order to be able to use the IPFS node from other machines, it’s necessary to
configure CORS properly with the IP of the Docker host (10.0.0.6 in my case):
docker exec -it ipfs /bin/sh
# ipfs config \
  --json API.HTTPHeaders.Access-Control-Allow-Origin \
  '["http://10.0.0.6:5001", "http://localhost:3000", "http://127.0.0.1:5001", "https://webui.ipfs.io"]'
# ipfs config \
  --json API.HTTPHeaders.Access-Control-Allow-Methods \
  '["PUT", "POST"]'
restic
In order to keep the data on r0n1n safe, restic is run periodically by
cron and backups every important directory to an external storage.
h4nk4: Ultra-Portable Data Center
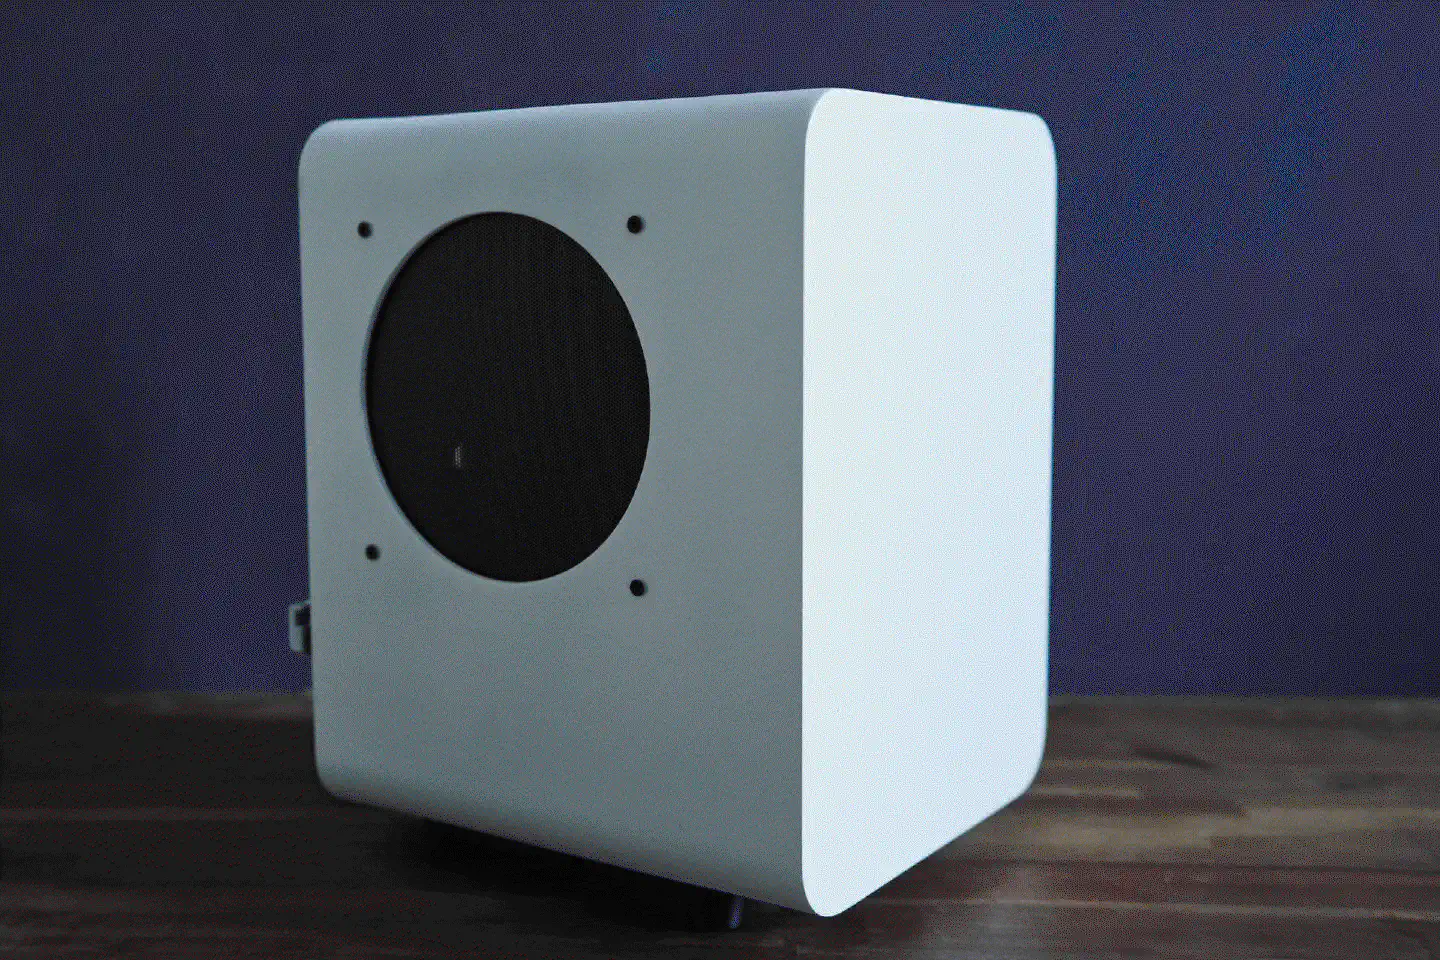
For everything that r0n1n is not capable of running due to resource
constraints and for vast amounts of storage there’s h4nk4, my
ultra-portable data center. I built this server a few years ago when I
was still using a MacBook Pro as my main machine. The UPDC runs
NixOS and hence is fully reproducible within the matter of hours, no
matter what might happen. The base system runs on a fully encrypted RAID1 on top
of two NVMe SSDs, the data storage is a set of four 2.5" Seagate Barracuda 4TB
drives that run in RAID5 – also fully encrypted. Part of the base system’s NVMe
RAID1 is used as cache for IO operations on the RAID5, resulting in an overall
great performance for data operations of up to 100GB at a time.
Back when I built h4nk4, it had pfSense running via KVM, which in
turn took care of the five ethernet ports the UPDC offers. With the network now
being under control of a0i the pfSense guest is not needed anymore. For
performance reasons it does however make sense to directly connect to the device
via ethernet cable nevertheless.
While h4nk4 still offers great benefits in terms of storage capacity, data
security and raw computing power, these days it’s not a crucial part of the
infrastructure anymore, and I’m looking forward to rebuild it at some point.
I would like to increase the amount of storage available while decreasing the
size and weight of the whole device. Since most of the heavy computations are
happening on my workstation, I don’t need h4nk4 to be a full-blown amd64
architecture anymore. Ideally, I can soon replace it with a more integrated
solution, e.g. a single-board computer that offers a way to connect at least
2 SATA drives at 6GBit/s and ideally one NVMe as cache.
v4u1t: A hardened OpenBSD Password Manager “Cloud” Service
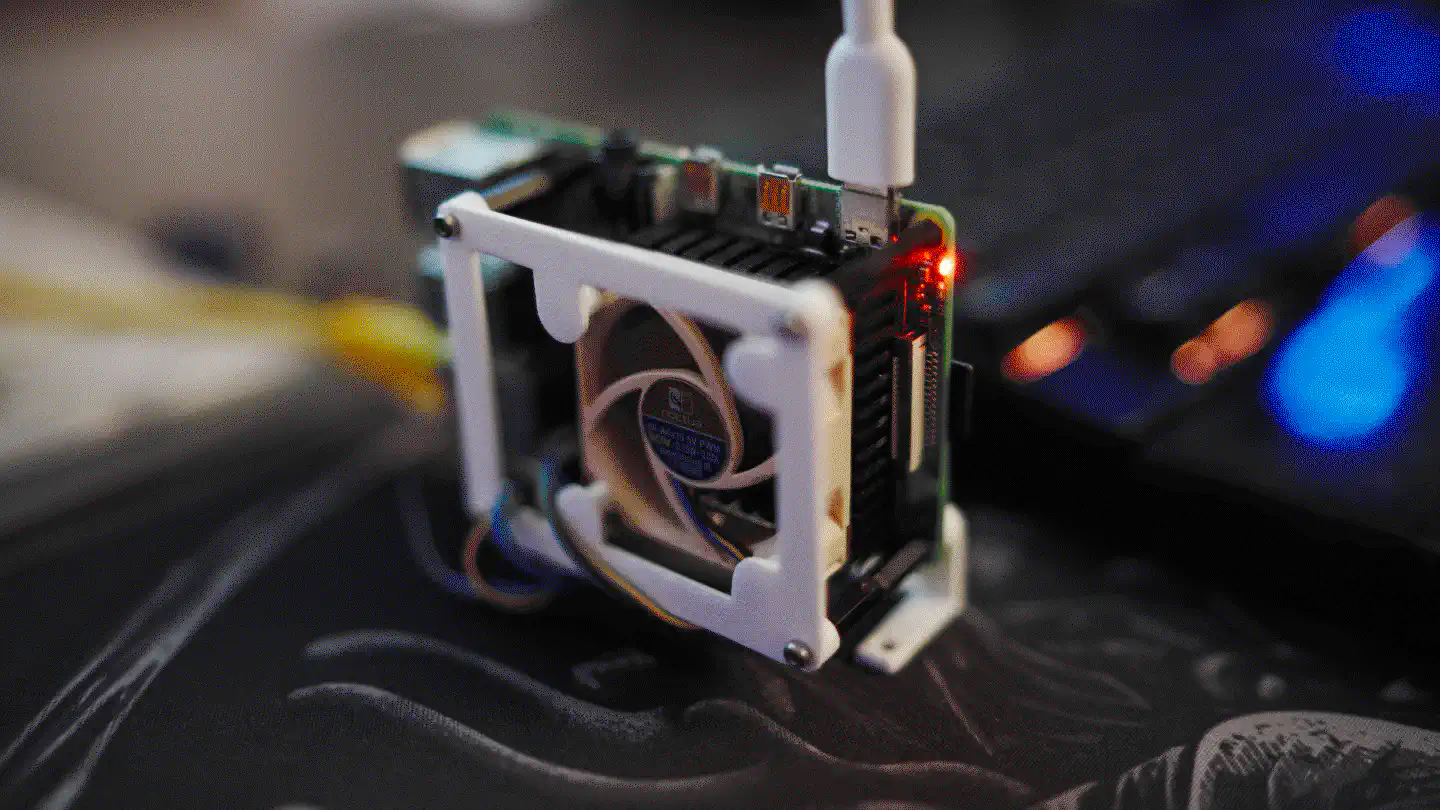
v4u1t is a Raspberry Pi 4B, running hardened OpenBSD and
Vaultwarden. It stores my password vaults and allows me to
use the Bitwarden clients to sync them onto every device/browser. The Raspberry
is solely available from within my HAN.
cbrspc7: The Workstation

My primary workstation is a SFFPC named cbrspc7. It runs the best
operating system in the world, or, how regular people call it,
Gentoo Linux. You can find out more about the why and how all
across this journal, and you can see up to date info on cbrspc7 on the
computer page.
The machine interacts with the rest of the HAN using gigabit ethernet – no
WiFi. It runs a Telegraf node and reports its data to r0n1n, so I can see and,
what’s more important, log all the important stats. Additionally I’m running
waybar, which allows me to display some stats directly on my desktop.
cbrspc7 will be extended soon. In fact, I’m currently waiting for XTIA to ship
my extension kit. With it, the device’s thermals and cable management will be
greatly enhanced. Believe it or not, but even though this build is completely
open, with ambient temperatures around 26°C, components sometimes hit peak
temperatures of over 75°C. Especially the secondary NVMe, that is mounted on
the backside of the motherboard, is constantly throttling, decreasing the overall
RAID1 performance of my fully encrypted ZFS setup. Hence I’m looking to give it
a little more room to breathe, add another set of fans to the frame and upgrade
the heatsinks.
For more info on the workstation, check the computer page.
j0l1y: A Portable, Battery-Powered SBC (a.k.a. Linux Phone)

If you’ve came across my post on the PinePhone Pro you know that I’ve been dipping my toes into that area lately. So far, the PinePhone Pro isn’t that much of a phone and more like a portable, battery-powered single-board computer. Unlike other IoT devices, like Raspberry Pis and Arduinos, it does however connect directly to my 5GHz WiFi and has full access to the rest of the network.
So far I’ve been only tinkering with different distributions and the apps that are currently available, but I’m looking forward to test some of my own projects on the PinePhone an maybe bring an actual mobile-optimized GUI version of them to the platform.
I have more phones clogging my WiFi, btw.
c4m3r4: A Raspberry Pi Zero W V1.1 Camera
c4m3r4 is one of the IoT devices that connect to the 2.4GHz WiFi provided by
r0n1n. It’s a Raspberry Pi Zero W V1.1 with a Raspberry Pi camera module and a
heatsink attached to it. It doesn’t have a fixed position and instead I move it
around all the time, depending on where I need it. For example, when I’m cooking
a soup and want to make sure it won’t boil over while I’m working at my
workstation, I simply attach it to a wall and point it towards the stove. Or
when I’m waiting for someone to come by, I attach it to the window and make it
point downwards to the entrance. And when I just want to watch the sunset while
I’m writing things like this, I simply attach it to the living room window and
play the RTSP stream using VLC on my desktop.

The Zero runs on a minimal installation of Debian 11.2 and v4l2rtspserver.
I compiled it on-device and created a supervisord configuration to keep it
from stopping/crashing:
root@c4m3r4:~# batcat /etc/supervisor/conf.d/v4l2rtspserver.conf
───────┬────────────────────────────────────────────────────────────────────────
       │ File: /etc/supervisor/conf.d/v4l2rtspserver.conf
───────┼────────────────────────────────────────────────────────────────────────
   1   │ [program:v4l2rtspserver]
   2   │ command=/usr/local/bin/v4l2rtspserver /dev/video0
   3   │ autostart=true
   4   │ startsecs=5
   5   │ startretries=5
   6   │ autorestart=true
   7   │ user=pi
───────┴────────────────────────────────────────────────────────────────────────
The image quality is fairly decent and the performance is pretty good, with very little latency. Also, thanks to the additional heatsink, the Zero keeps its cool even when streaming for extended periods of time:
root@c4m3r4:~# vcgencmd measure_temp
temp=36.9'C
When I was still locked into Apple’s ecosystem, I used the hkcam
firmware to make the stream available to HomeKit devices. hkcam worked
extremely well for that purpose, the overall stream performance was however not
as great as it is with v4l2rtspserver. If I was to redo the HomeKit setup
today, I would probably use the v4l2rtspserver setup in combination with
Homebridge to have the RTSP stream available on iOS and macOS devices.
Other IoT devices
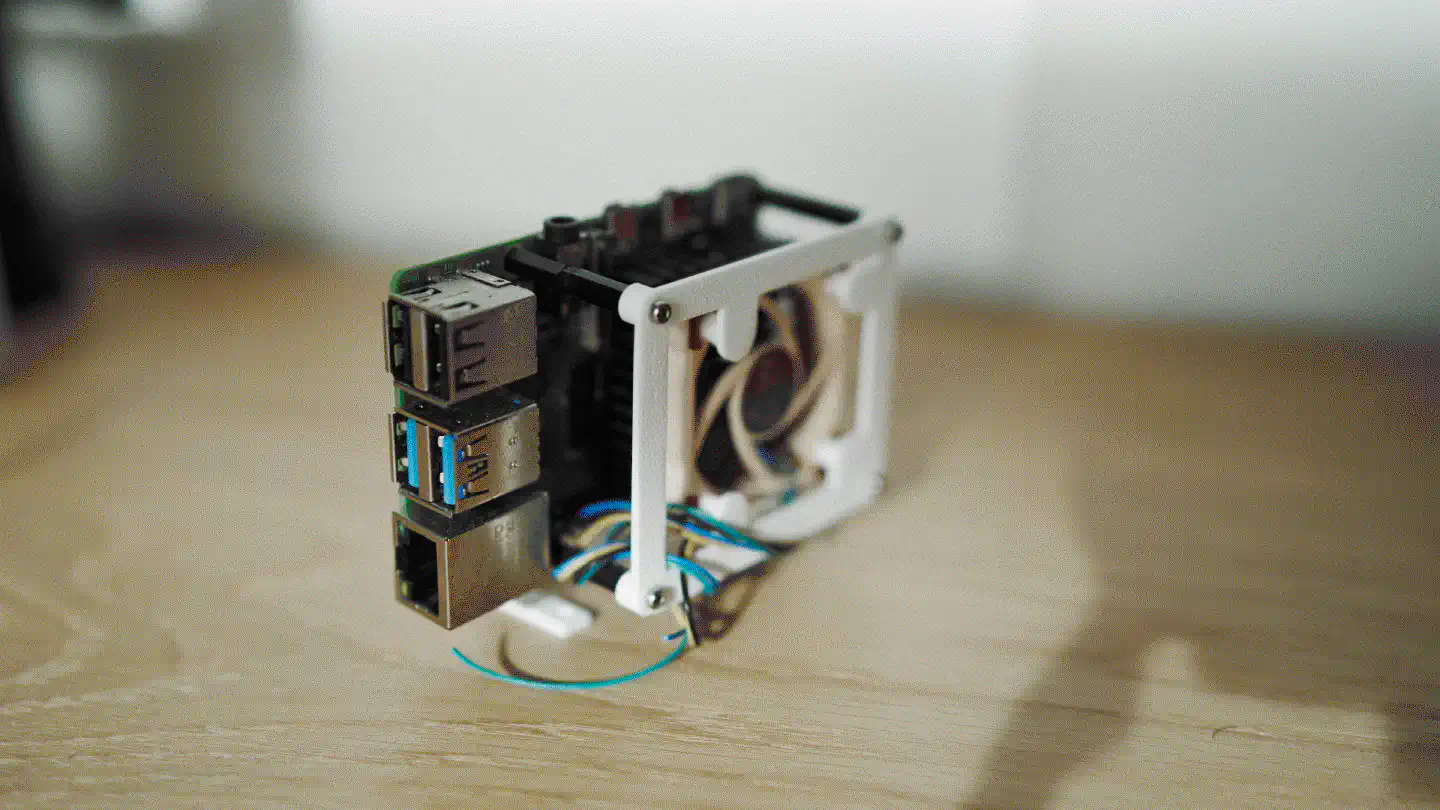
Apart from the devices listed above I have more devices that I tinker around with, most prominently single-board computers like the Raspberry Pi 4, and micro-controllers like the Adafruit Feather M0 WiFi, the SiFive HiFive 1 revB or the SparkFun ESP32-S2. It would go well beyond the scope of this post to list them all, including the way they’re set up. I also often switch firmwares to try out new things, therefore these parts of the infrastructure are ever changing.
To Be Continued …
As mentioned before, one of the next big projects will be rebuilding h4nk4
into something significantly smaller with as much or even more capacity. I’m
closely watching the latest developments in the areas of SBCs and NUCs, but so
far I haven’t really seen anything that could work as a replacement for the AMD
machine.
Another todo on my list regards the Netgear Nighthawk LTE router, that I would like to replace with a more open alternative. While this is certainly possible today, people have tried and found it to be a mixed bag. I do however believe that the efforts going into projects like the PinePhone Pro will ultimately benefit this area enough for it to become less of a PITA. Hence, the PinePhone could actually lead to become my first try replacing the Netgear router.
There are still a few more unfree devices around, like the MacBook that I solely use for Capture One and DaVinci Resolve these days, or the iPhone that holds on to all the banking apps and ISP apps and all the other things that would simply not work reliably on a non-Apple, non-Google device. Oh, and the Apple Watch, that I began to only use during workouts. While there’s no real open source alternative to that either, there are at least other sports watches that might allow me to pull my data off them without using proprietary apps or cloud services. A few more things I’m looking forward to change. However, all in all I’m very satisfied with the progress and how everything turned out so far.
Enjoyed this? Support me via Monero, Bitcoin or Ethereum! More info.